Prerequisites
- Download an IDE from this link: VSCode
- Install PHP and a local web server. You have two options:
- XAMPP — Download here. Includes Apache + PHP + MySQL. After installing, open the XAMPP Control Panel and start Apache.
- Laragon — Download here. A lightweight and modern alternative, recommended for Windows users. Just install and click Start All.
Let’s get started
Open a project
All PHP files must be placed inside the correct web server folder so they can be run in the browser. XAMPP- Windows:
C:\xampp\htdocs\ - Mac/Linux:
/Applications/XAMPP/htdocs/
- Windows:
C:\laragon\www\
learn-php. Then open that folder in VSCode via File > Open Folder.
Create a new file
Click the add-file icon in the sidebar, then typeindex.php. Press Enter to create it. The file structure of a PHP project generally looks like:
- PHP
*.php— server logic, fetching data, processing forms, generating HTML - HTML
*.htmlor inside*.php— the content users see on the page - CSS
*.css— styling for HTML elements
- PHP fetches data from a database (who is logged in, what products are available)
- HTML displays that data on the page
- CSS makes it look clean and organized
Run the project
Open your browser and go to: XAMPPindex.php.
PHP
Comments
PHP Tags
PHP code is always written between an opening and closing tag:.php file:
echo is used to output content to the page.
PHP file structure
CSS
Just like in plain HTML, you can use CSS to style your page. There are 3 ways to do it (the 2nd is recommended): 1. Inline CSS (attribute) Easiest, but not recommended — it clutters your HTML when styles get complex.style.css file and link it from your PHP file. This is the best approach as your project grows.
index.php
<style> tag in the <head>. Not recommended for larger projects.
Systematic thinking
How can human logic be expressed in code? PHP can do it! Let’s get familiar with the fundamentals.PHP Programming Concepts
Variables
Variables in PHP always start with a$ sign.
- Always start with
$ - No spaces — Wrong:
$full name - Use camel case — Correct:
$fullName - Or snake case — Correct:
$full_name
Data Types
String — text, wrapped in quotes.true or false.
Conditionals
if / elseif / else$atSchool = false and $age = 3:
!$atSchool— ! is negation (the opposite). So this is true.$atSchool && $age > 1— && means “and”. Both must be true for the whole expression to be true; if either is false, the result is false.$atSchool || $age > 1— || means “or”. If at least one is true, the result is true.
Functions
Functions in PHP use thefunction keyword. They can accept parameters and return a value with return.
Built-in functions
PHP has many built-in functions ready to use:
Form & Interaction
One of PHP’s core strengths is processing HTML forms. The form is submitted to the server and PHP handles it directly — no extra code needed on the browser side.Sending data with a form
index.php$_POST— retrieves data from a form submitted with thePOSTmethod$_GET— retrieves data from the URL (query string).— the concatenation operator, used to join strings together
Dynamic Output
PHP generates HTML on the server before sending it to the browser. This means the page content can change based on data — all without any extra code on the browser side.Loop to display data
Include other files
PHP can split a page into reusable components:Ready?
You now understand the basics! Let’s put this into practice by building a real project.Layouting
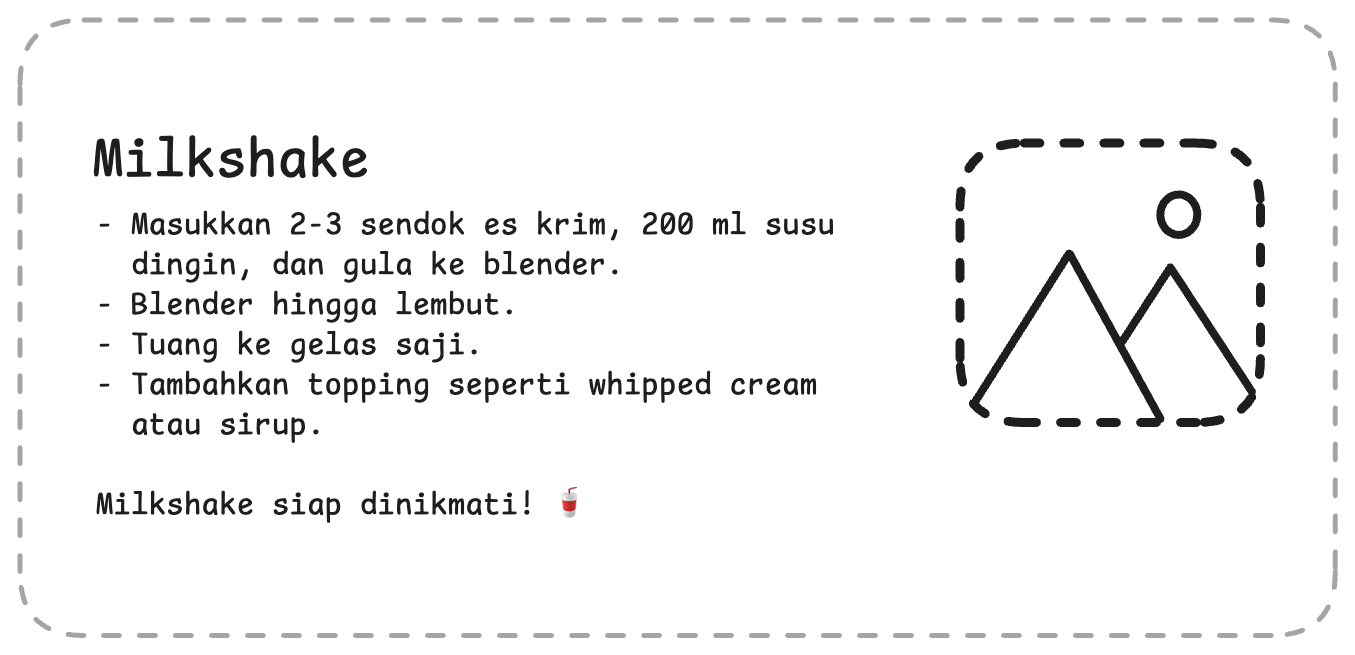
For this project, you’re expected to already understand the basics above.Level 1: Text Procedure
Here you need to understand HTML concepts: list elements, headings, images, and CSS: layout, padding, and border. This is the layout prototype — good luck!Tips and requirements
- You can use the
floatorflexproperty in CSS - Include images with
<img src="..."/>— you can use a local file or a URL from the web - Use list elements in HTML, for example:
- List data can be stored in a PHP array and looped into HTML
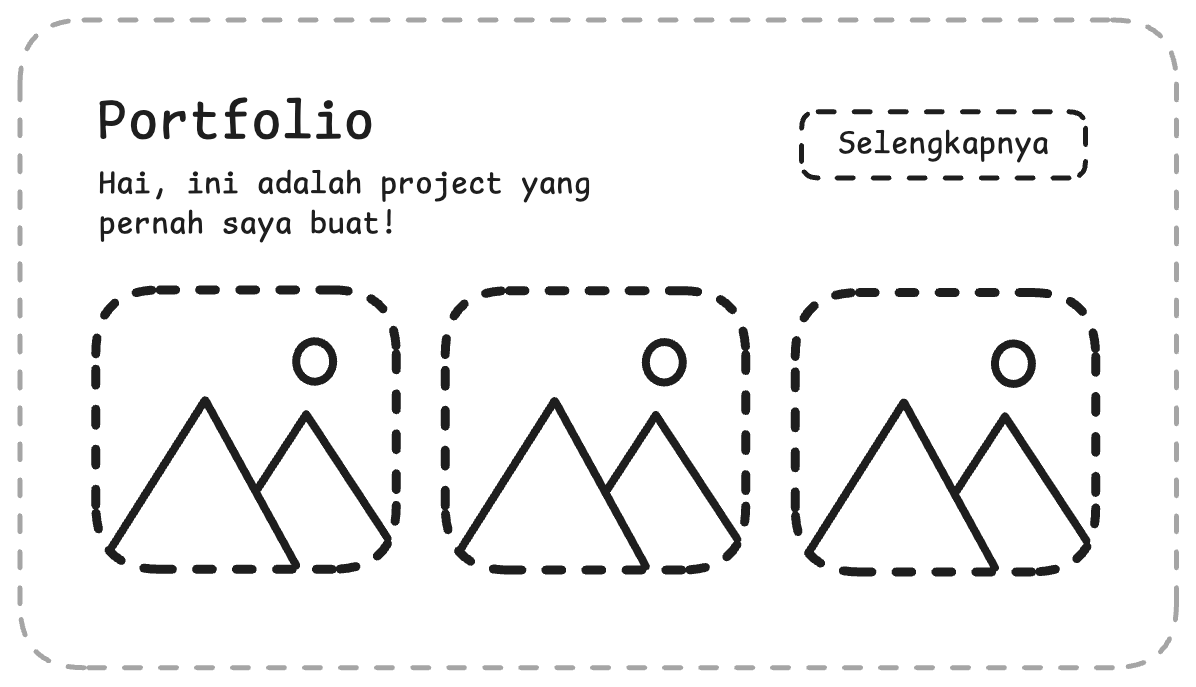
Level 2: Portfolio Section with a Form
Here you need to combine HTML (form/button), CSS (layout), and PHP (processing input). This is the layout prototype — good luck!Tips and requirements
- Build a form with a name input, then display a welcome message after it’s submitted
- Match the layout exactly. You can use flexbox in CSS:
- Use
$_POSTto retrieve form data in PHP - Display data conditionally:
- Always use
htmlspecialchars()when displaying user input — this prevents XSS attacks
Submit
Add your Github link or project in Google Drive then the community will review and help you together. Please stay tuned on Discord to see the latest updates!