Backend
This is where the programming logic lives. We’ll be using Laravel — a powerful and elegant PHP framework. The backend covers databases, API routing, business logic, and much more.Database
Where do you think sites like Instagram store user data and posts? In Excel, Word, Notepad? Technically possible, but it won’t scale. We use a database — similar to a table — and there are two main types: relational and non-relational.- Relational — You define column names and their data types (the structure). Examples: MySQL, PostgreSQL, etc.
- Non-relational — No fixed schema; you insert data without defining the structure upfront, often in the form of objects/documents. Examples: MongoDB, Redis.
Database Setup
- Download Laragon. Run the installer and accept the default settings.
- Once installed, open the app and click Start All.
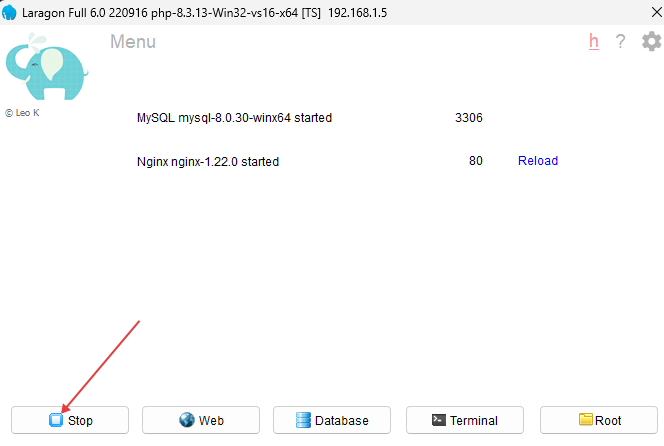
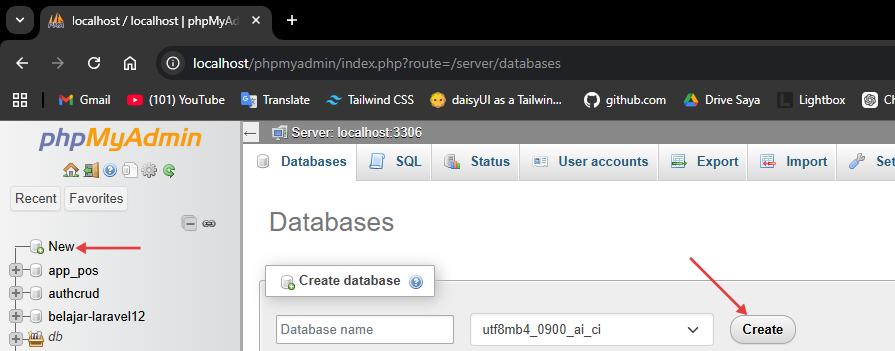
- Open
localhost/phpmyadminin your browser. Create a new database by clicking New in the sidebar, enter a name, then click Create.
API Routing
Complex applications usually have many features — like Instagram: upload, edit, delete, view posts, view profiles, algorithm, etc. We break these down into routes. For example:Let’s Build the API
APIs often expose CRUD (Create, Read, Update, Delete) via different routes. For example: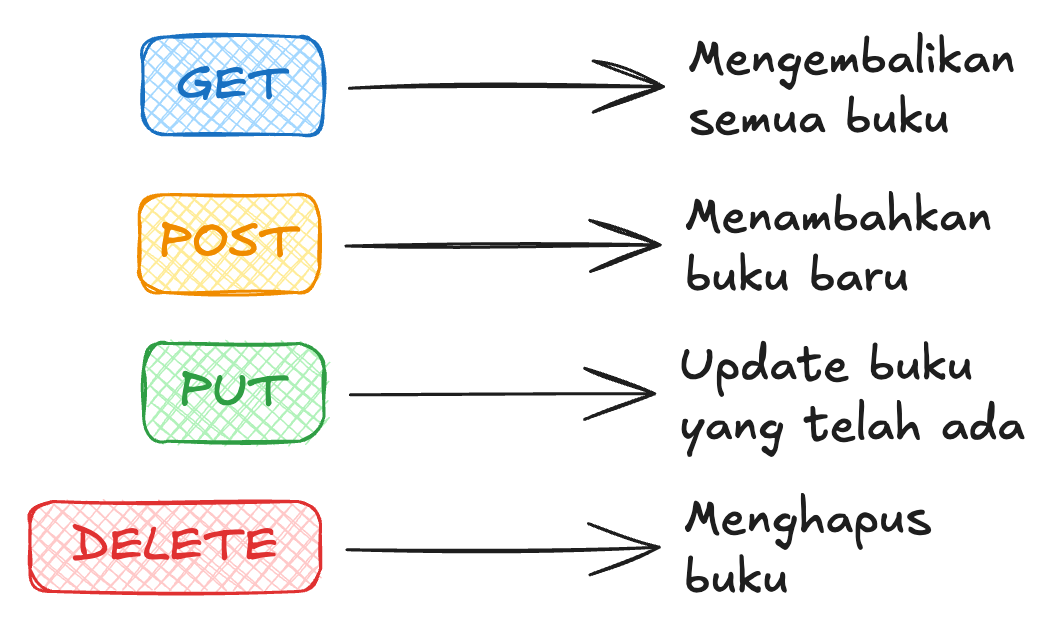
- GET
/posts— list/view posts - PUT
/posts/{postId}— update a post by ID
How Do You Run It?
First, install Composer. We’ll use Laravel to manage both the API and the database.Laravel
Laravel is a PHP framework that already covers almost everything we need: routing, ORM, validation, and much more. Make sure PHP and Composer (PHP’s package manager, like NPM but for PHP) are already installed. Check with:npm init -y but far more complete — Laravel immediately sets up the entire project structure.
Fundamentals
Important Folder Structure
Installing Packages
To install a package in Laravel, use Composer:--dev flag:
composer.json, installed packages appear under require or require-dev:
.env
The.env file is one of the most important files for storing secret variables. Its values live on the server, not in the code — so they stay safe. Examples: database connection, port, API keys.
Laravel automatically reads .env without needing to install any additional library.
.env
.env variables using the env() helper:
config() to access pre-mapped configuration:
Running the App
Standard wayArtisan CLI
artisan is Laravel’s built-in CLI tool, like the Swiss Army Knife of Laravel. Some frequently used commands:
Library
There’s a library that needs modernizing. You have an idea: build a web app so book loans are tracked automatically and digitally. You could use Google Sheets — but we can build something simpler and more minimal, with only the features needed, without all the menus and complexity of a spreadsheet. Curious how? Let’s get started!Initial Overview
This continues from the syntax module. Make sure you’ve already installed Laravel and set up Composer. Here’s the structure of our API workflow:
Ready?
Initial Laravel Setup
Create a new project and configure.env:
localhost:8000. Laravel already displays a welcome page by default because there’s a route in routes/web.php.
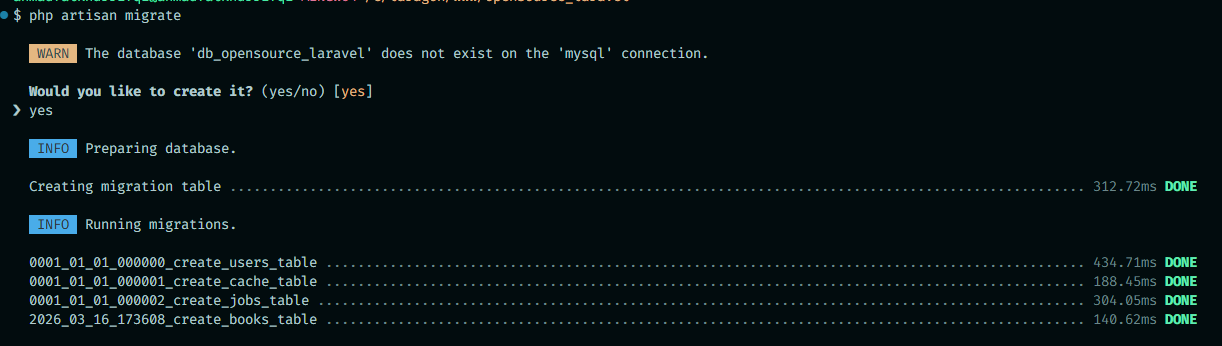
Migration & Model Setup
In Node.js we use Prisma to define the schema and interact with the database. In Laravel, we use Migrations for table structure and Eloquent ORM for database operations — both are built-in. Create a Model and Migration at the same time with a single command:app/Models/Book.php and a migration file in database/migrations/.
Open the migration file (its name has a timestamp, like 2024_01_01_000000_create_books_table.php) and edit it:
database/migrations/xxxx_create_books_table.php
uuid('id')— a unique id in the form of a random string (equivalent to@default(uuid())in Prisma)string('name')->unique()— a name field that cannot be duplicatedtimestamps()— automatically addscreated_atandupdated_atcolumns
books table is already there!
Model Setup
Openapp/Models/Book.php and add the configuration:
$fillable is equivalent to defining which fields can be updated directly from a request. This is a Laravel security feature.
Enable API Routes
In Laravel 11+, run this command once:routes/api.php. All routes in this file automatically get the /api prefix — so the /books route is accessible at http://localhost:8000/api/books.
Let’s Build the API
APIs typically expose CRUD (Create, Read, Update, Delete) operations via different routes. For example:- GET
http://localhost:8000/api/books— list all books - POST
http://localhost:8000/api/books— add a book - PUT
http://localhost:8000/api/books/123— update the book with id123 - DELETE
http://localhost:8000/api/books/123— delete the book with id123
Create a Controller
--api flag immediately creates a template with the CRUD methods needed.
Register Routes
Openroutes/api.php:
Testing the API
Use a lightweight VS Code extension like Thunder Client to test your API.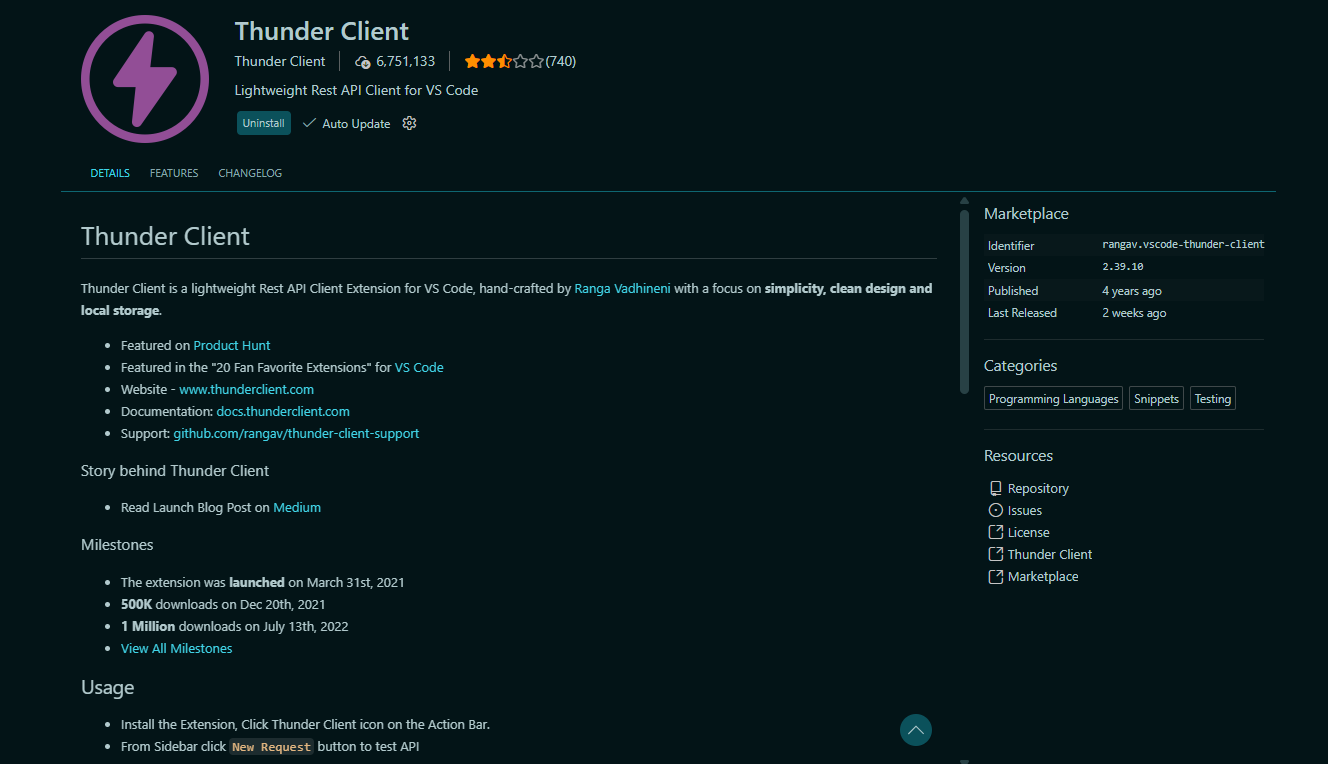
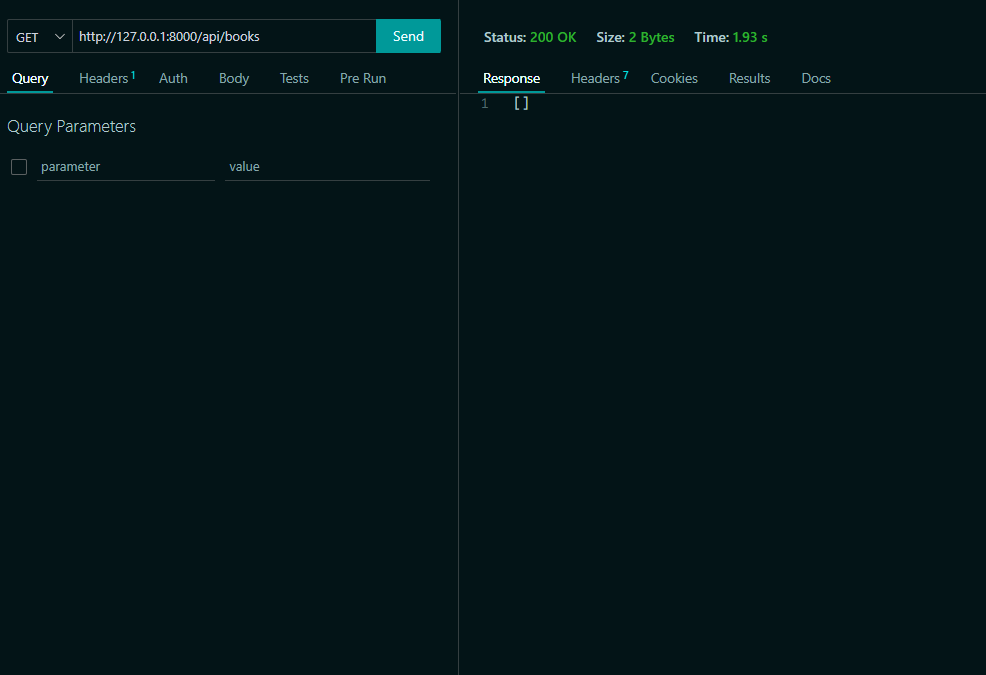
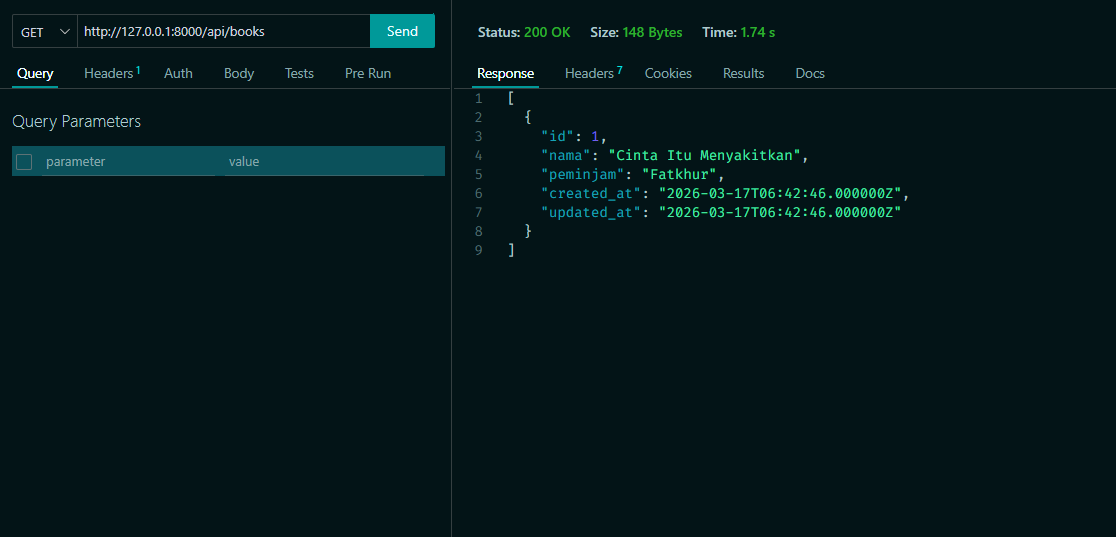
GET /api/books
Open app/Http/Controllers/BookController.php and fill in the index() method:
Book::all() retrieves all data from the table.
Open Thunder Client, send a GET request to http://localhost:8000/api/books, and click Send. The response will be [] since no books have been added yet.
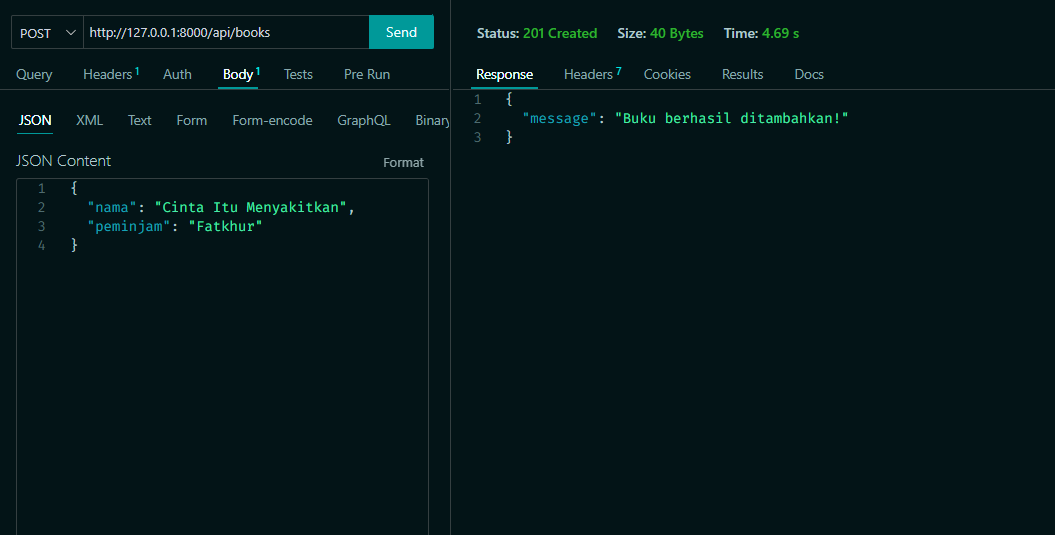
POST /api/books
Here we read data from the request body.
$request->validate() also immediately returns a 422 error if validation fails — no manual try/catch needed!
In Thunder Client, change the method to POST, add a JSON body like {"name": "Laskar Pelangi", "borrower": "Budi"}, and click Send. You’ll see a success message.
/api/books again — you’ll see the newly added book, complete with its generated UUID id.
PUT /api/books/{id}
The route uses {id} as a dynamic segment. In Laravel, this parameter is automatically available as a controller method argument.
Book::find($id) is equivalent to db.books.findUnique({ where: { id } }) in Prisma. $request->only([...]) ensures only the fields we want are updated.
DELETE /api/books/{id}
Same as PUT: find the book by id, then call delete(). Try implementing this one yourself!
Cool-down
Has your API fully implemented CRUD? Are all book routes working, including Delete? In the next project we’ll add better error handling and a route to fetch a single book by id.Refinement
Welcome to the final project! Your task is to refine the library API we’ve built by completing the steps below.
Before uploading the project, delete the vendor folder and make sure .env is not included in the upload.
- #1 Make sure the DELETE route works to delete a book by id.
-
#2 Add a GET route that returns a single book by id in the
show()method. -
#3 Add a status code to every response. Use:
return response()->json(['message' => '...'], [status code]);For the full list, see HTTP status codes.Status code When to use 200 Successfully returned data 201 Successfully created new data 404 Data not found 422 Validation failed (handled automatically by Laravel) 500 Server error - #4 Create a separate Form Request class for cleaner validation:
- #5 Handle exceptions with try/catch for unexpected errors:
Submit
Add your Github link or project on Google Drive, then the community will review and help together. Keep an eye on Discord for the latest updates!