Backend
This is where the programming logic lives. We’ll use JavaScript here. The backend covers the database, API routing, business logic, and more.Database
Where do you think sites like Instagram store user data and posts? In Excel, Word, Notepad? You could, but that wouldn’t scale. Instead we use databases—like tables—and they come in relational and non-relational types.- Relational — You define column names and data types (the structure). Examples: MySQL, PostgreSQL, etc.
- Non-relational — No fixed schema; you insert data without defining structure upfront, often in an object/document form. Examples include MongoDB.
Setting up the database
- Download XAMPP. Run the installer and accept the default settings.
- After installation, open the app and click Start for Apache and MySQL.

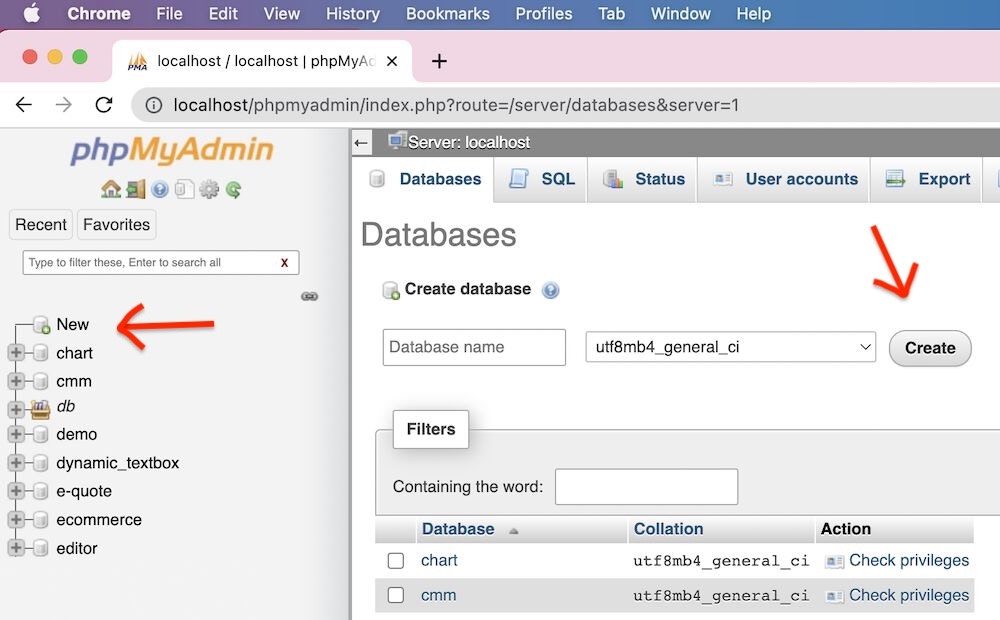
- Open
localhost/phpmyadminin your browser. Create a new database by clicking New in the sidebar, entering a name, then clicking Create.
API routing
Complex apps usually have many features—like Instagram: upload, edit, delete, view posts, view profile, algorithms, etc. We split those into routes. For example:- GET
/posts— list/view posts - PUT
/posts/{postId}— update a post by ID
How do we run it?
Install Node.js first. We’ll use Express.js to handle the API and Prisma to work with the database.Node.js
After installing Node.js, create a new folder and open a terminal. Run:package.json file. The -y flag uses default configuration.
Fundamentals
Installing libraries
To install a package, use:--save-dev flag so they’re added as dev dependencies:
-g flag so you can run them from the terminal:
package.json, the name property defaults to your folder name. The express package appears under dependencies and prisma under devDependencies:
Export & import
Default export [Export] — Typically used for your own functions or variables:module.exports, you can import like this:
Running the program
Normal wayscripts property—e.g. start—and set its value to the command above:
node command, you have to rerun it every time the file changes. With nodemon, the process restarts automatically when you edit the file:
You can add this as a script in package.json too if you want a custom command.
.env
The.env file is one of the most important files for storing secret variables. Values live on the server, not in your code, so they stay secure—e.g. database connection URL, port, API keys.
Install the dotenv library:
.env is: NAME_IN_CAPS=value (often all caps for the key).
In the file where you need them (e.g. index.js), require dotenv and call dotenv.config(). Then access variables with process.env.VARIABLE_NAME.
Library
There’s an old-fashioned library that could use an update. You have an idea: build a web app so book lending is tracked automatically and digitally. You could use Google Sheets—but we can build something simpler and minimal, with only the features we need, instead of all the menus and complexity of a spreadsheet. Curious how? Let’s go!Initial overview
This continues from the syntax module. Make sure you’ve already set things up: nodemon, Prisma, Express, dotenv. Here’s the workflow structure for our API: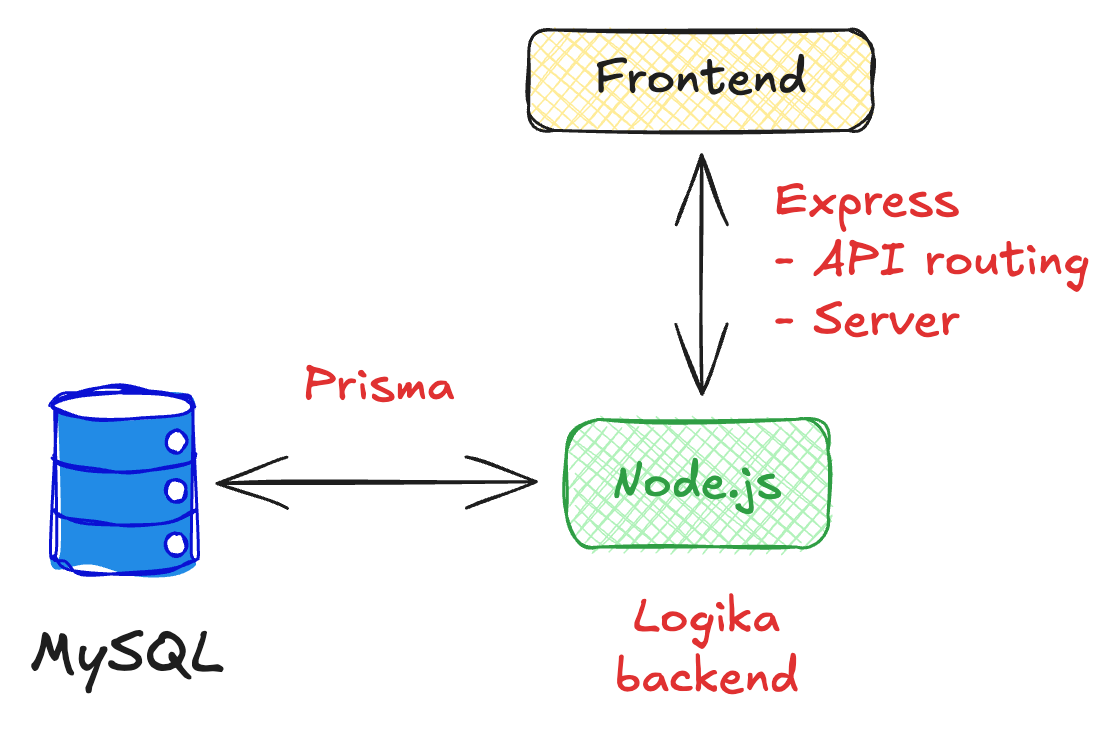
Ready?
Express setup
Create a new file, e.g.index.js, and a .env file in the same folder (e.g. a folder named library).
localhost:3000. Nothing shows yet because we haven’t defined any routes, but the server is up.
Add a route:
/ (root) route, use this handler. It receives two parameters: req (request) and res (response). We use res to send output. Refresh the browser and you’ll see “Hello World”. Yes, it’s more setup than plain HTML—we’ll see the benefits soon.
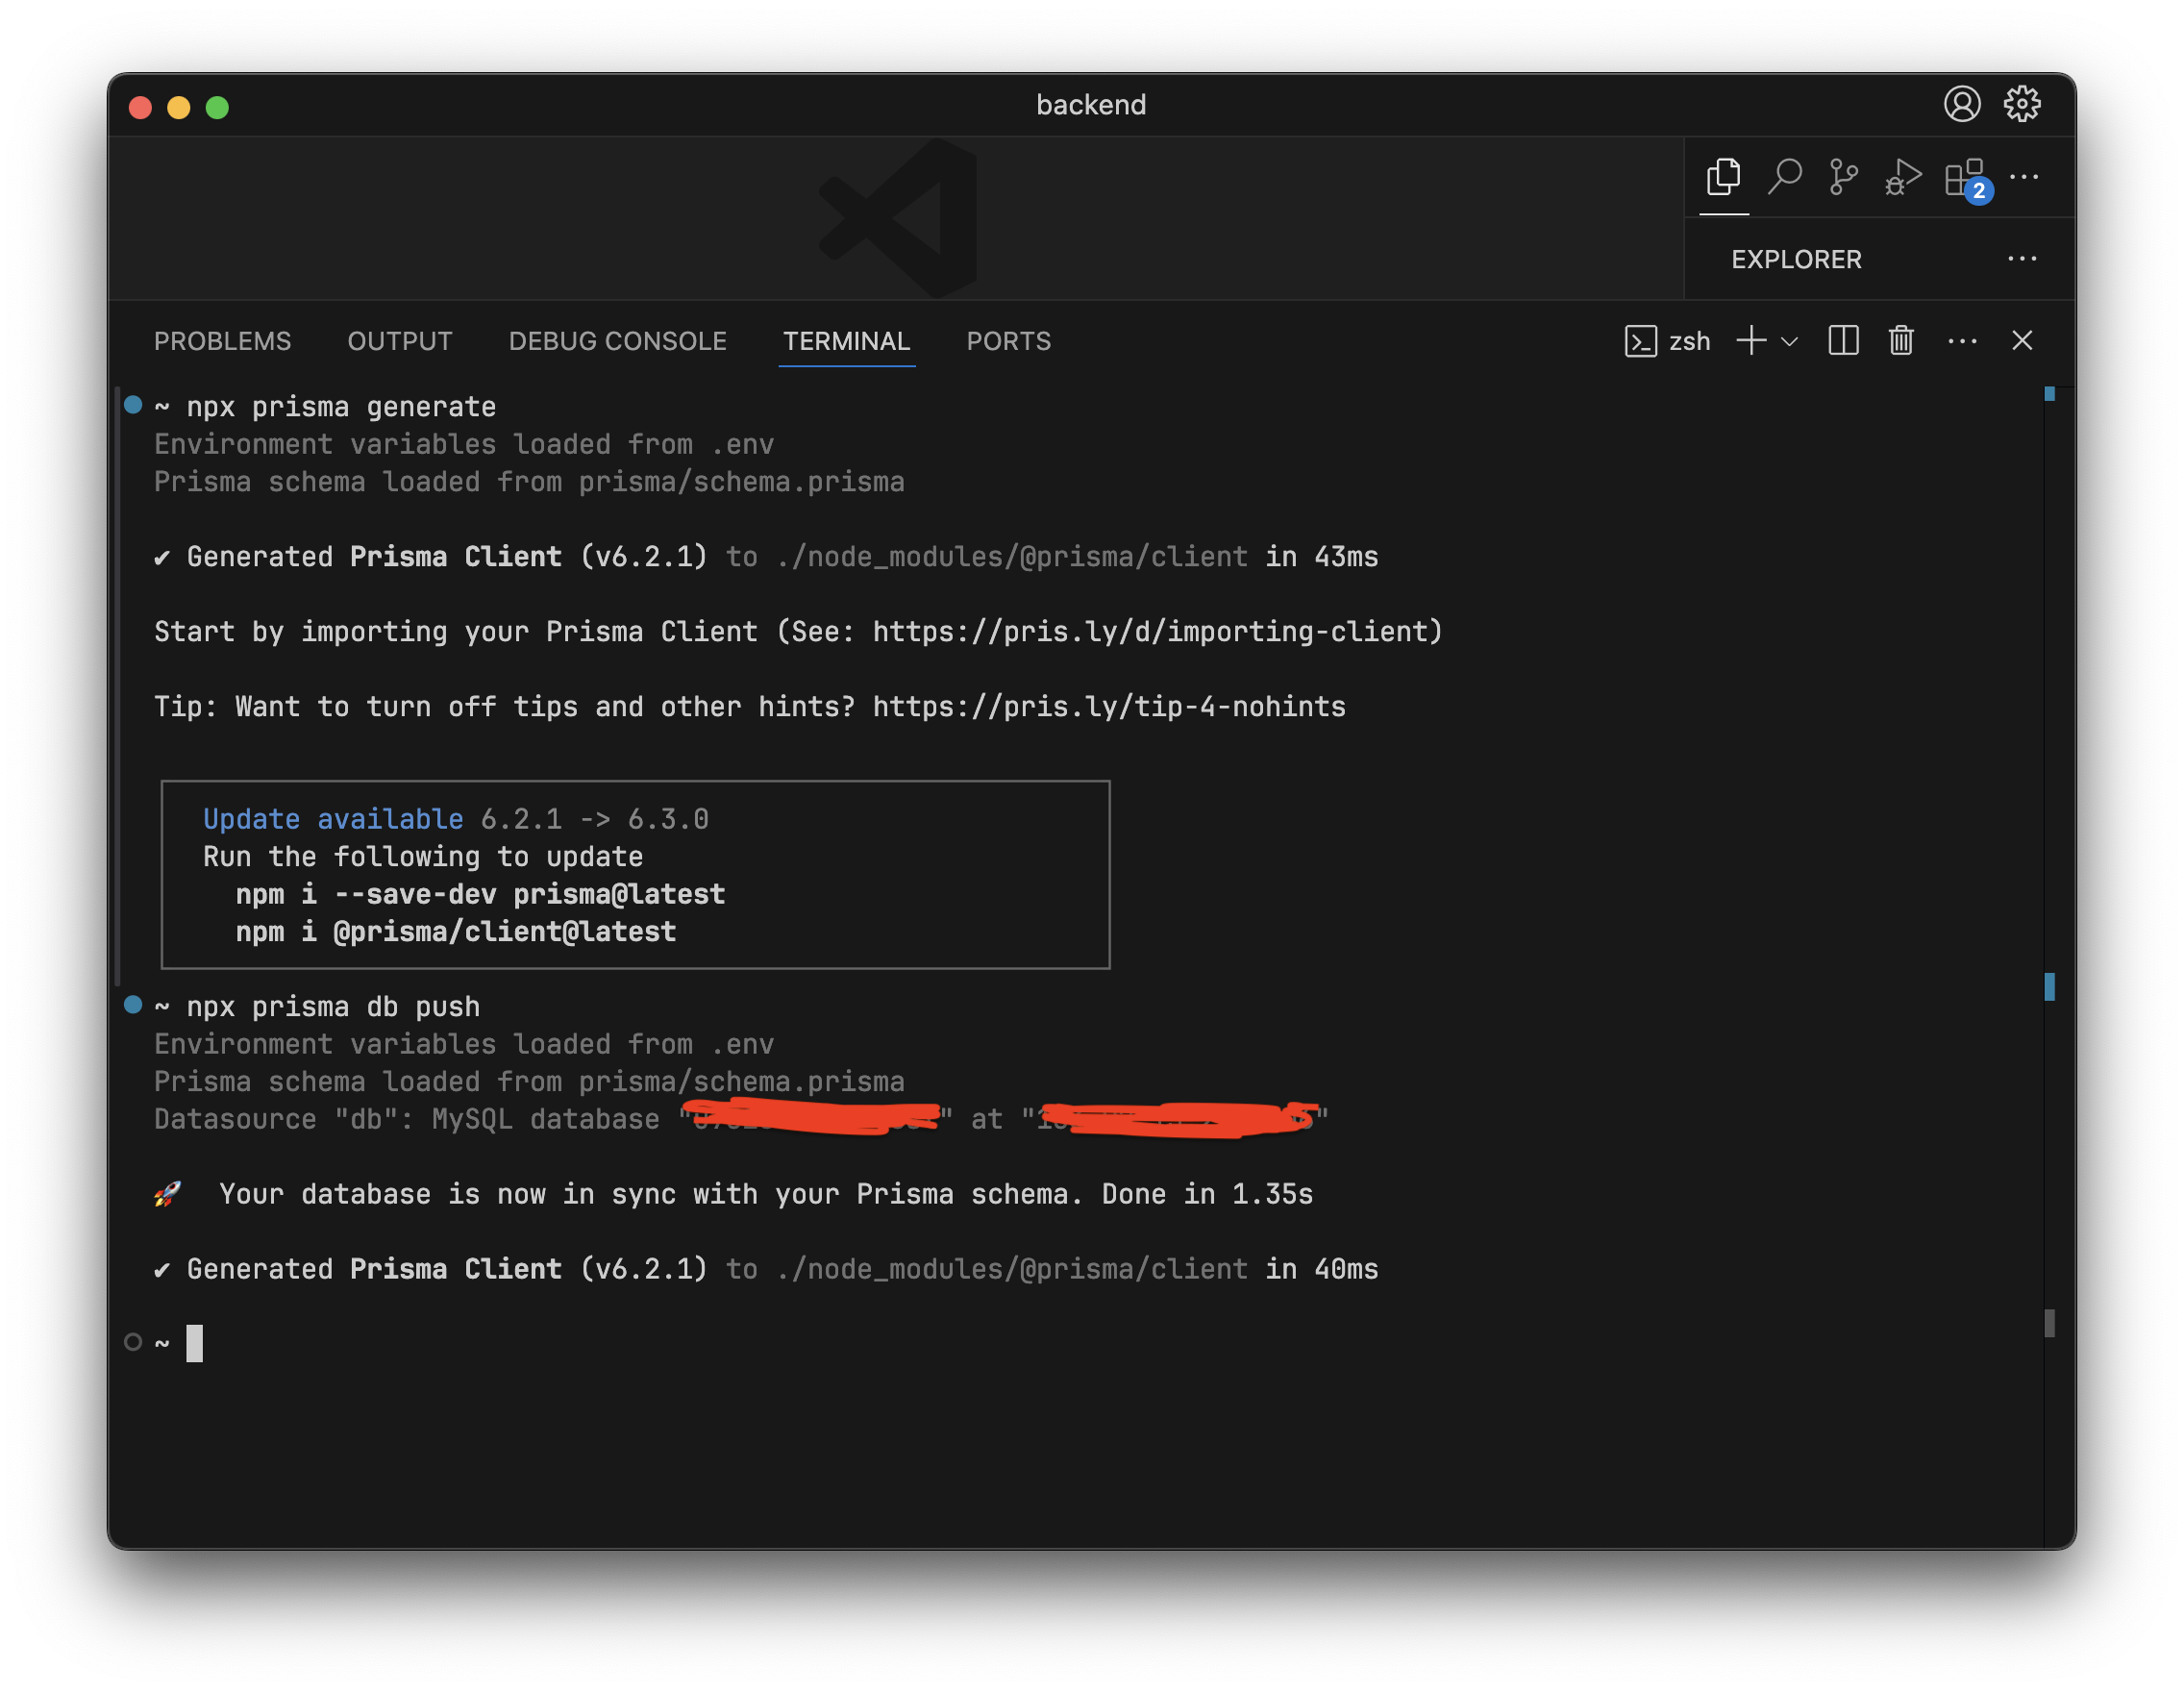
Prisma setup
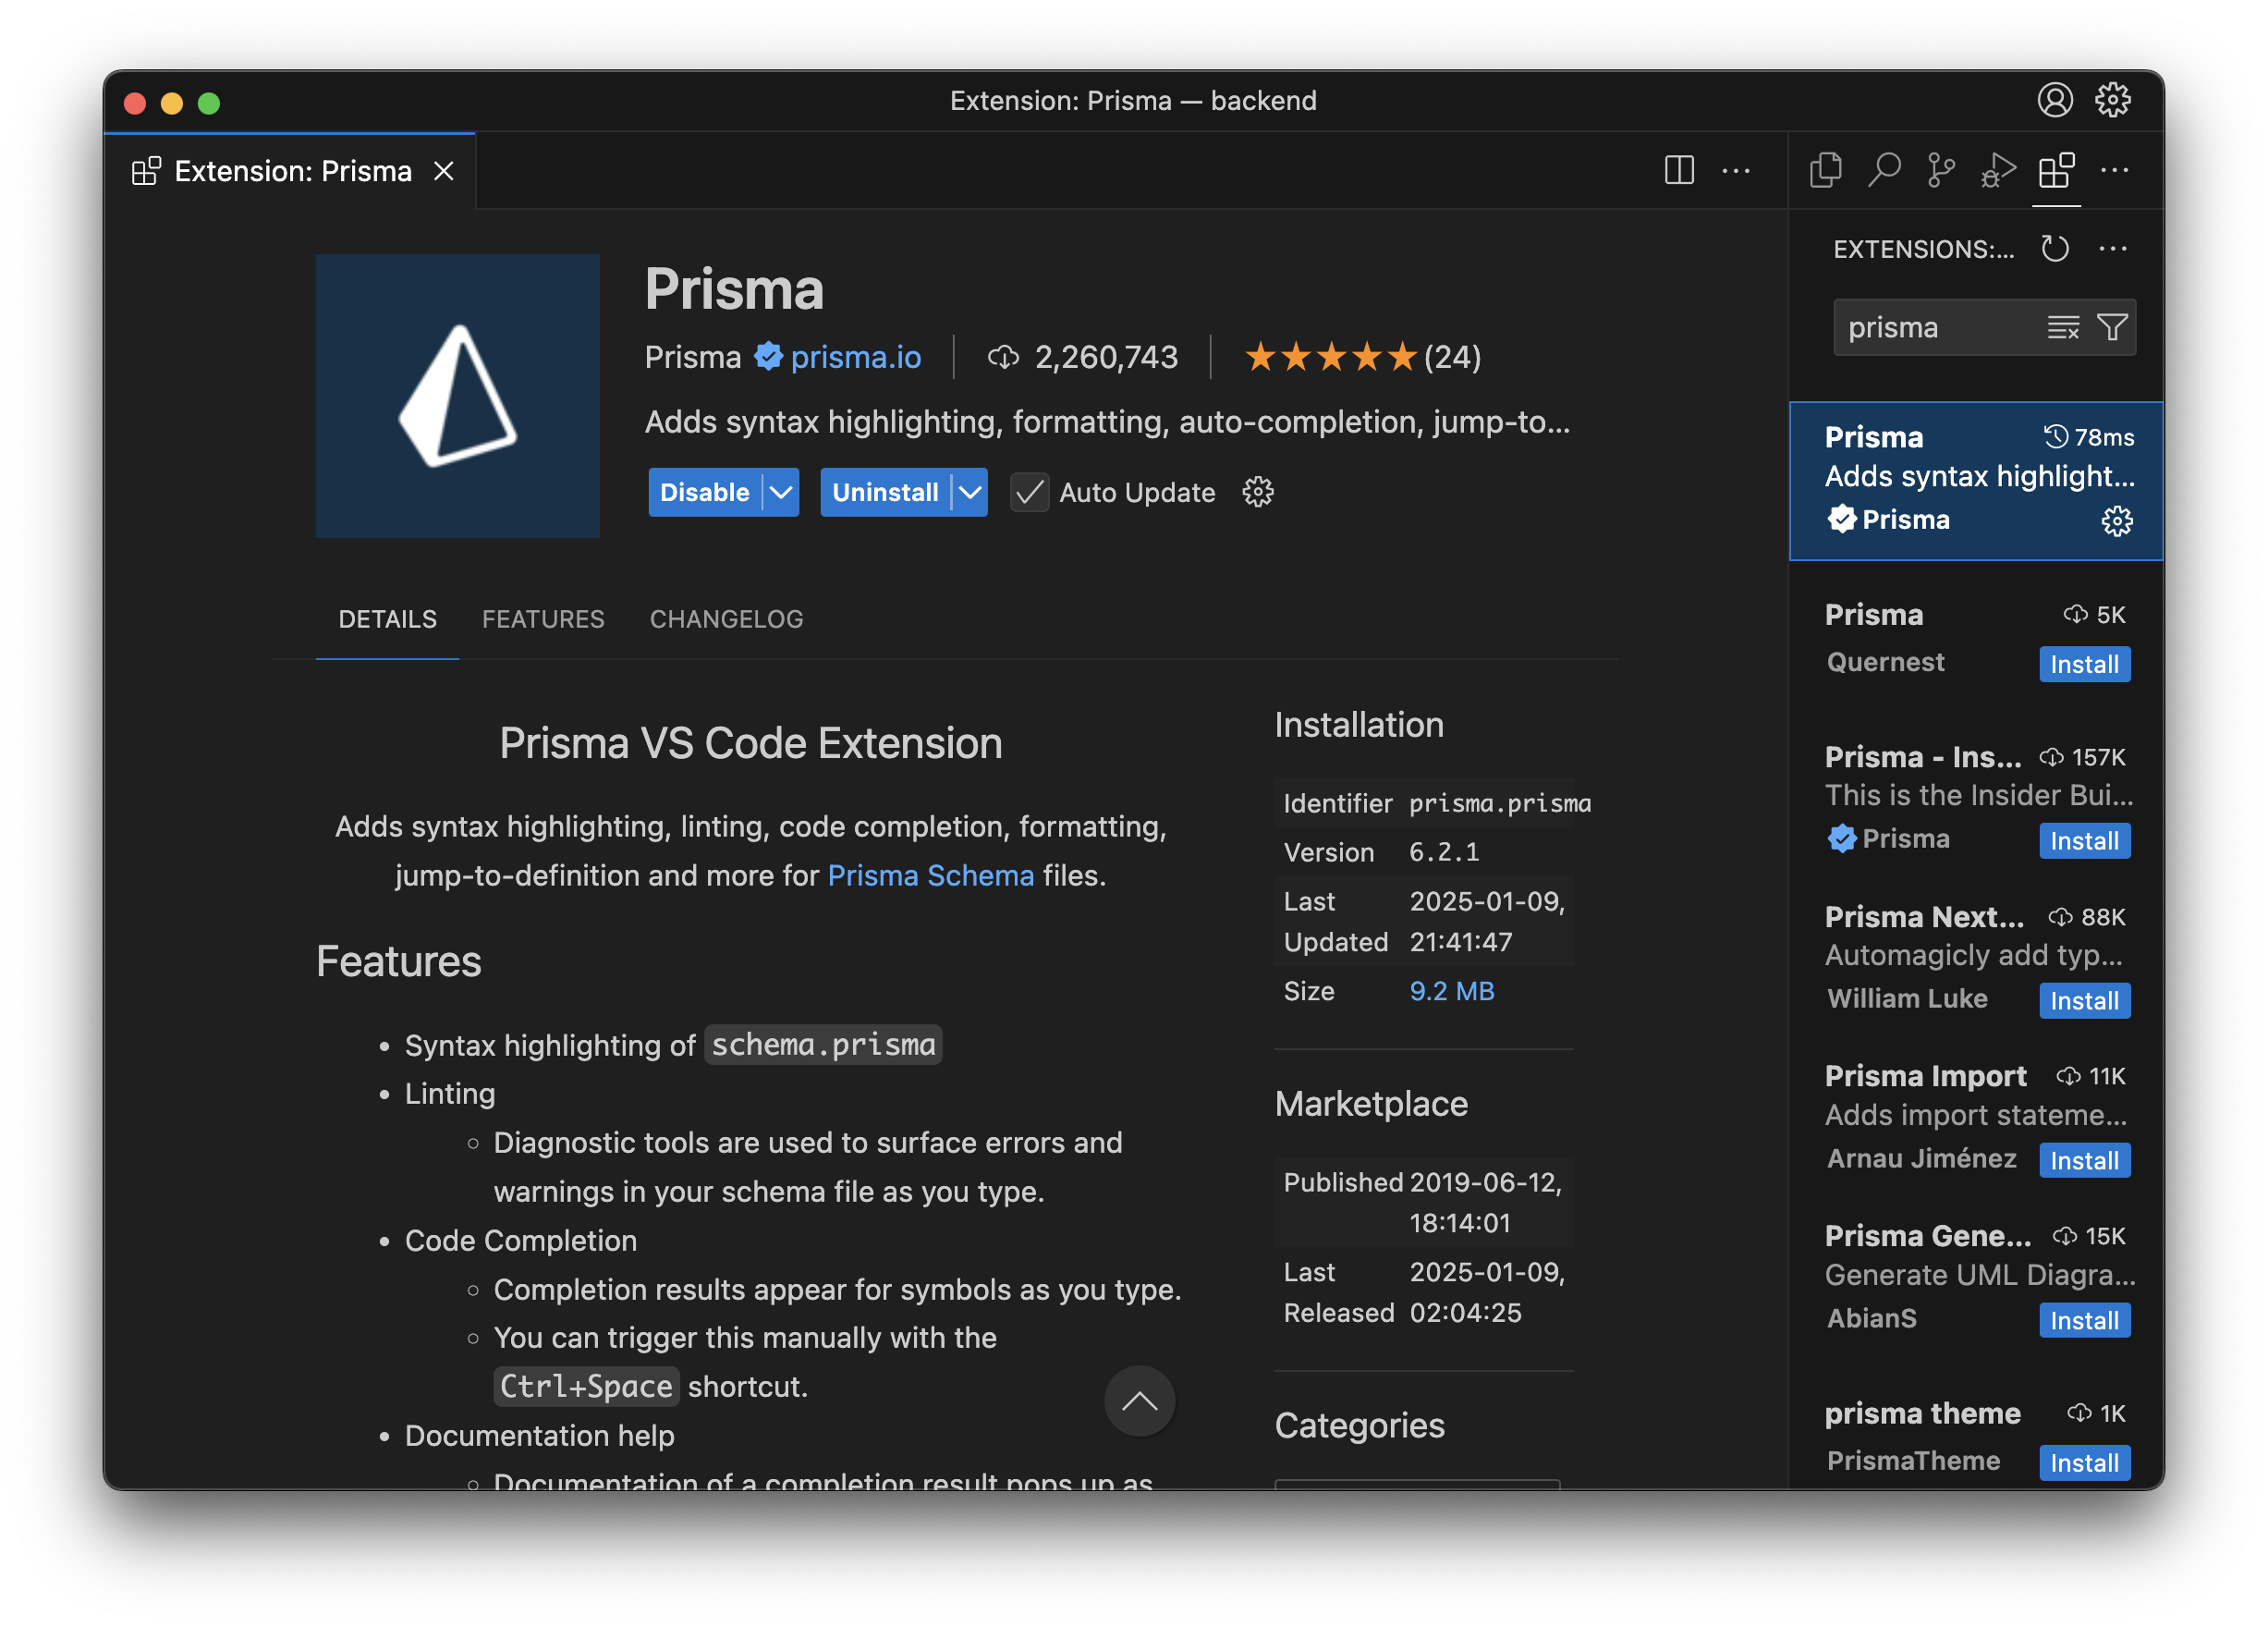
Prisma lets you work with the database in a simple, type-safe way. First, run:.env is updated (that’s normal—it’s Prisma’s initial setup). For a better experience, install the Prisma extension in VS Code for syntax highlighting and autocomplete in .prisma files.
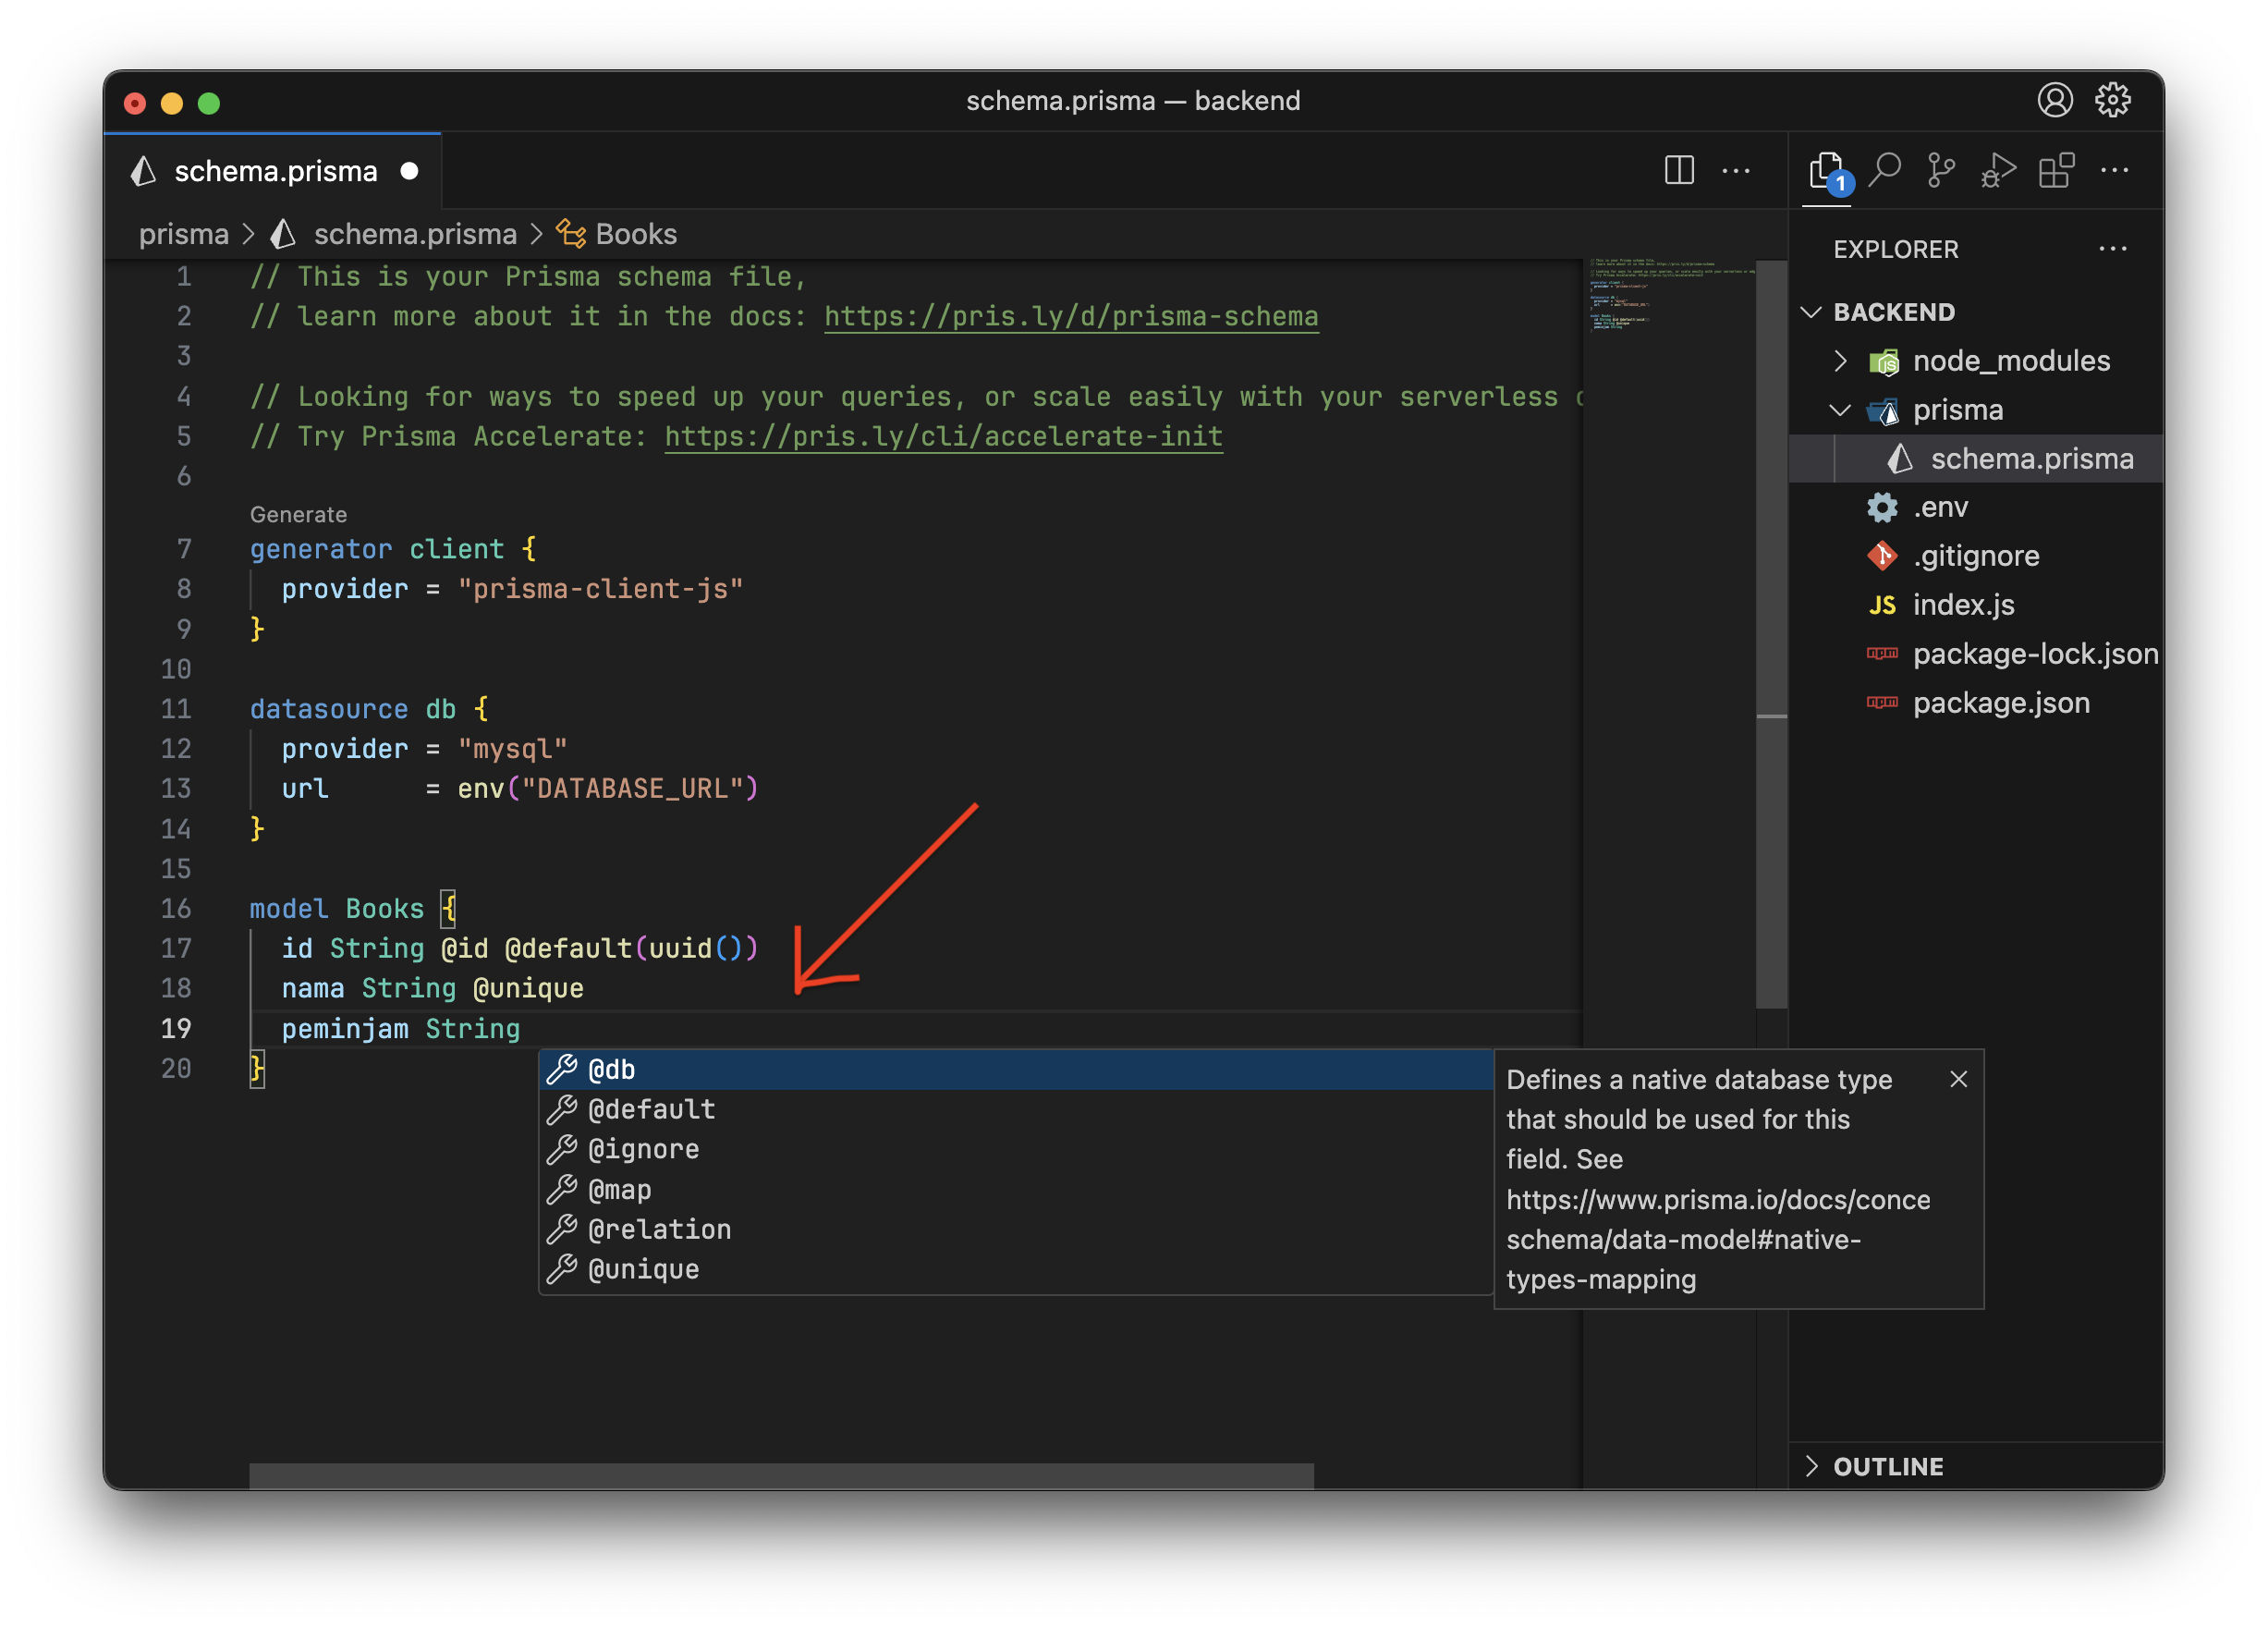
- In the
datasource dbblock, setproviderto"mysql"(instead ofpostgresql). - We define a Books table with
id,nama, andpeminjamand their types. namais@uniqueto avoid duplicate book names.@default(uuid())gives each row a unique random string asid.
.env with your database URL. Below is the default when you haven’t created a custom user yet. Replace [your-db-name] with the database name you created in phpMyAdmin.
For a custom username, password, and database you can use MySQL (or do it in phpMyAdmin). Example for creating a user and database:
.env:
Let’s build the API
APIs often expose CRUD (Create, Read, Update, Delete) via different routes. For example:
- GET
http://localhost:3000/books— list all books - POST
http://localhost:3000/books— add a book - PUT
http://localhost:3000/books/123— update the book with id123(the id changes per book) - DELETE
http://localhost:3000/books/123— delete the book with id123
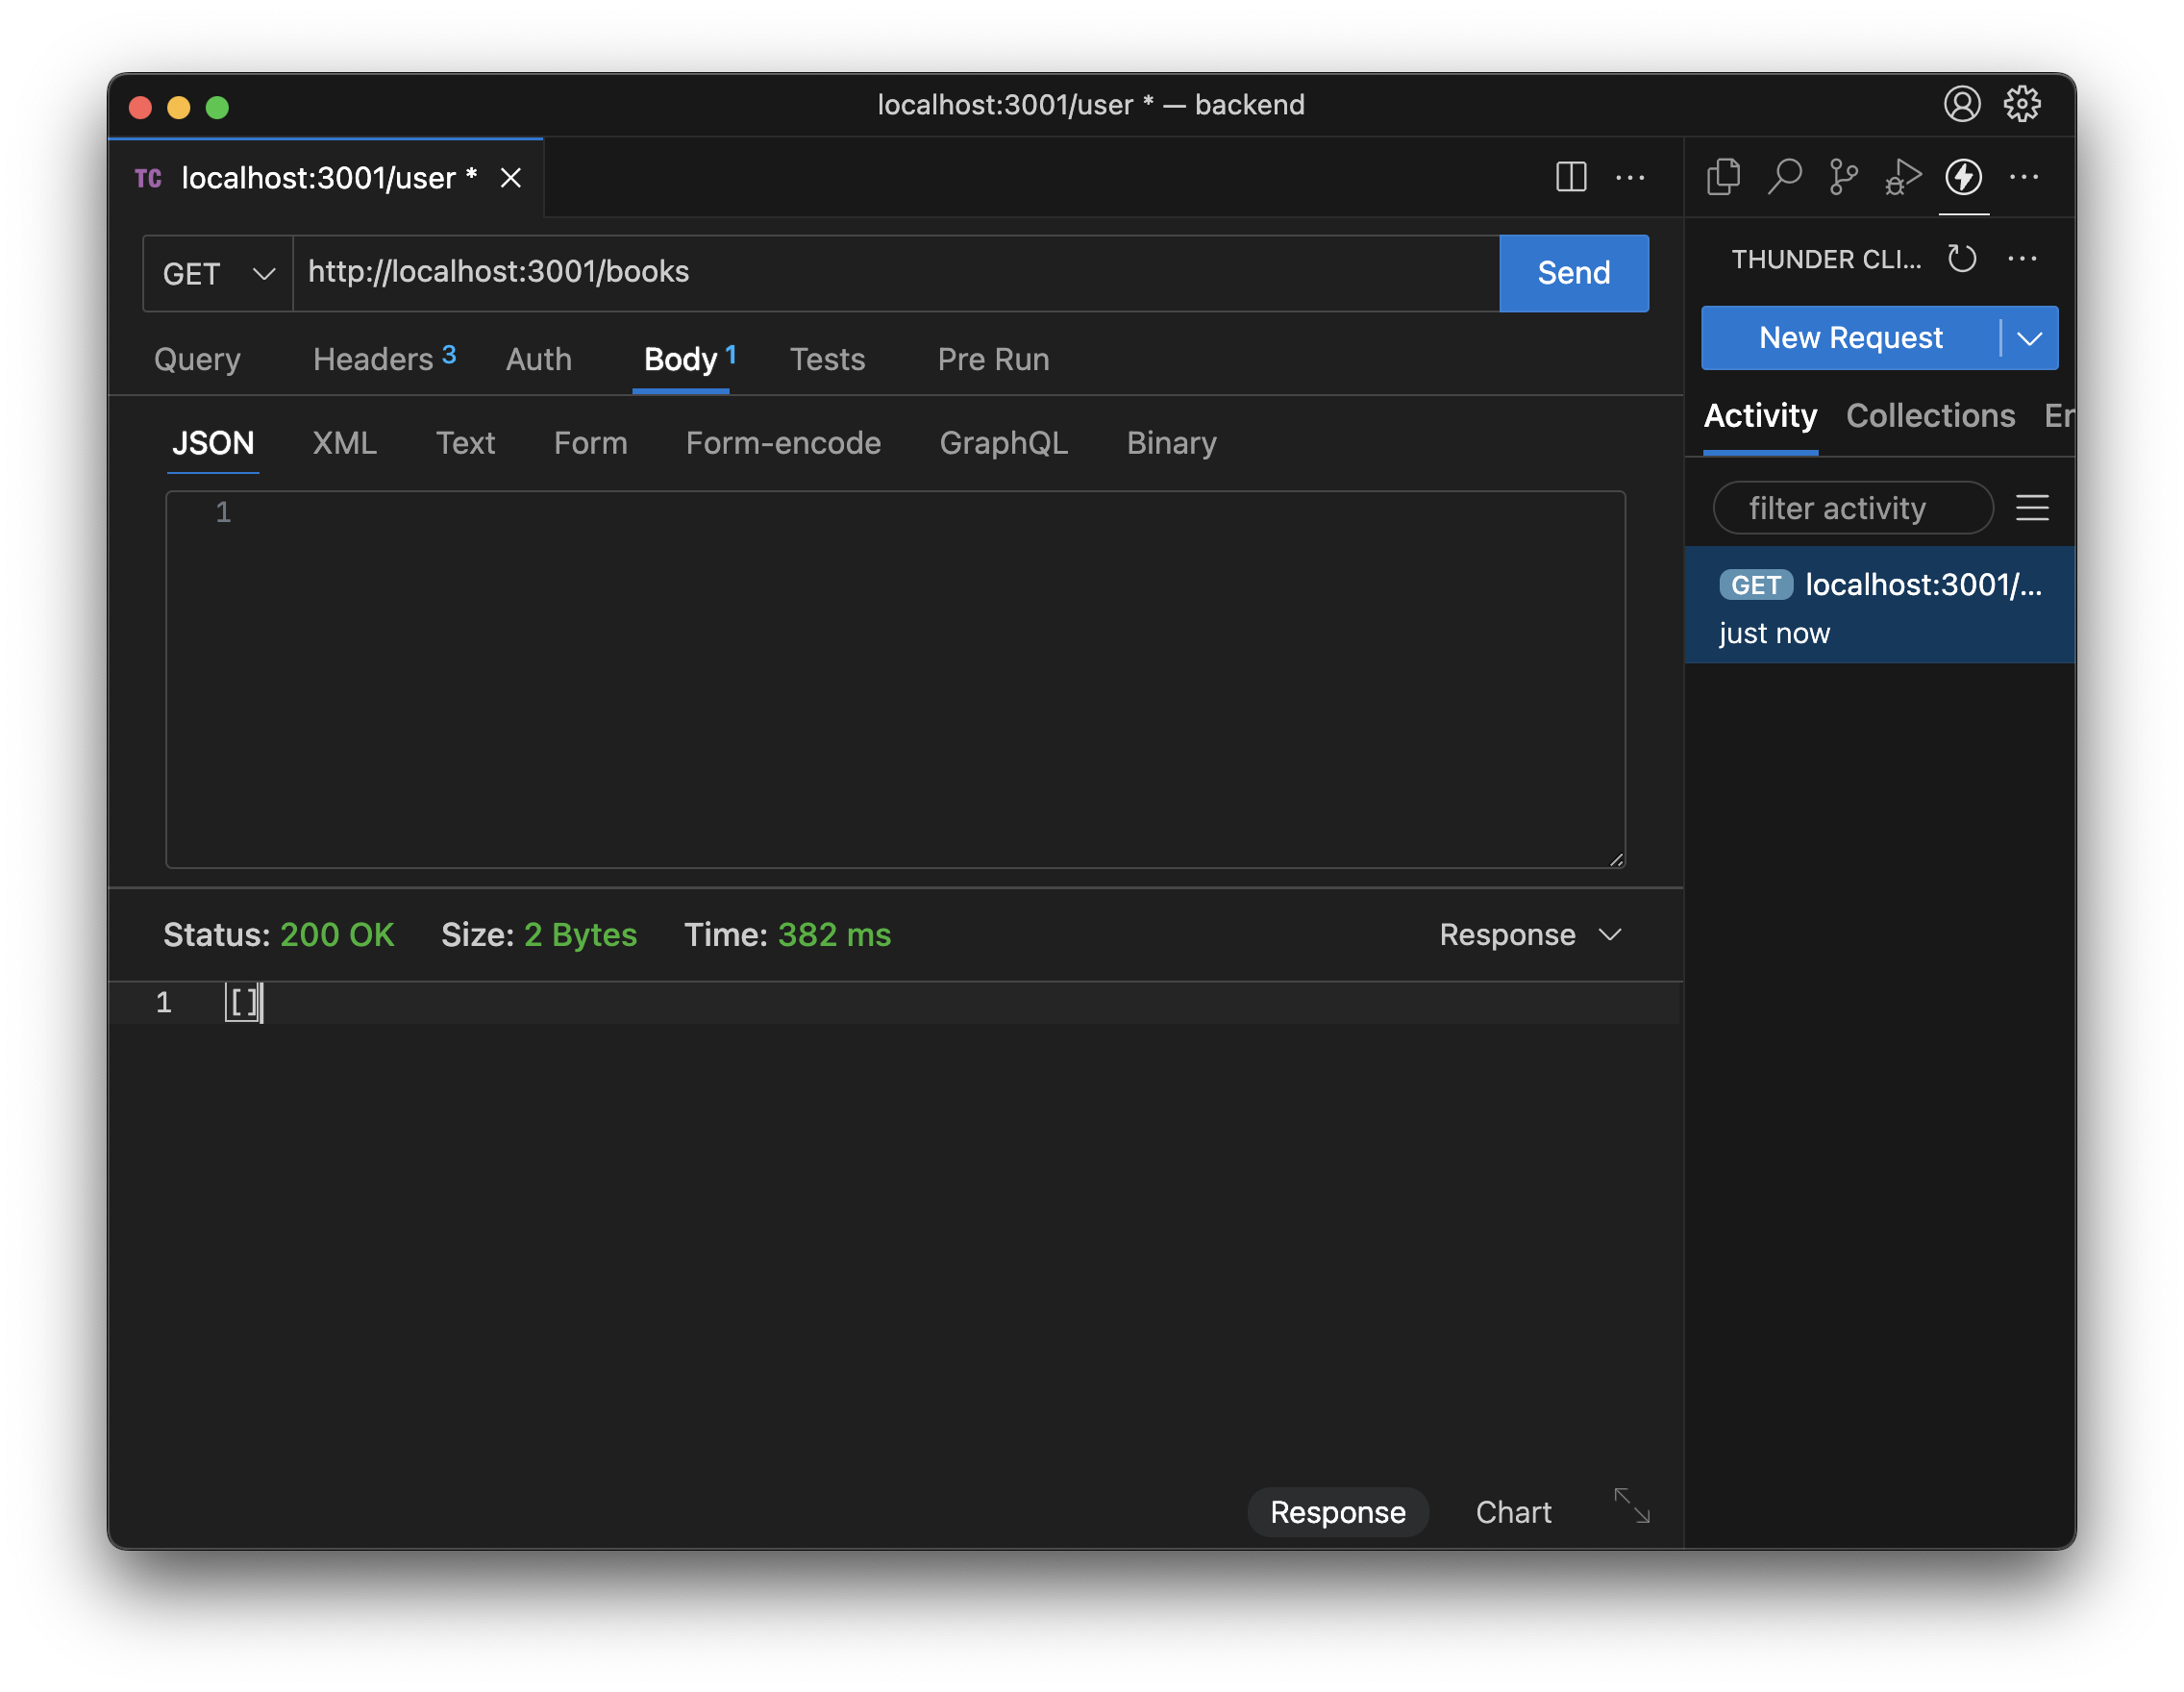
Testing the API
Use a lightweight VS Code extension like Thunder Client to test your API.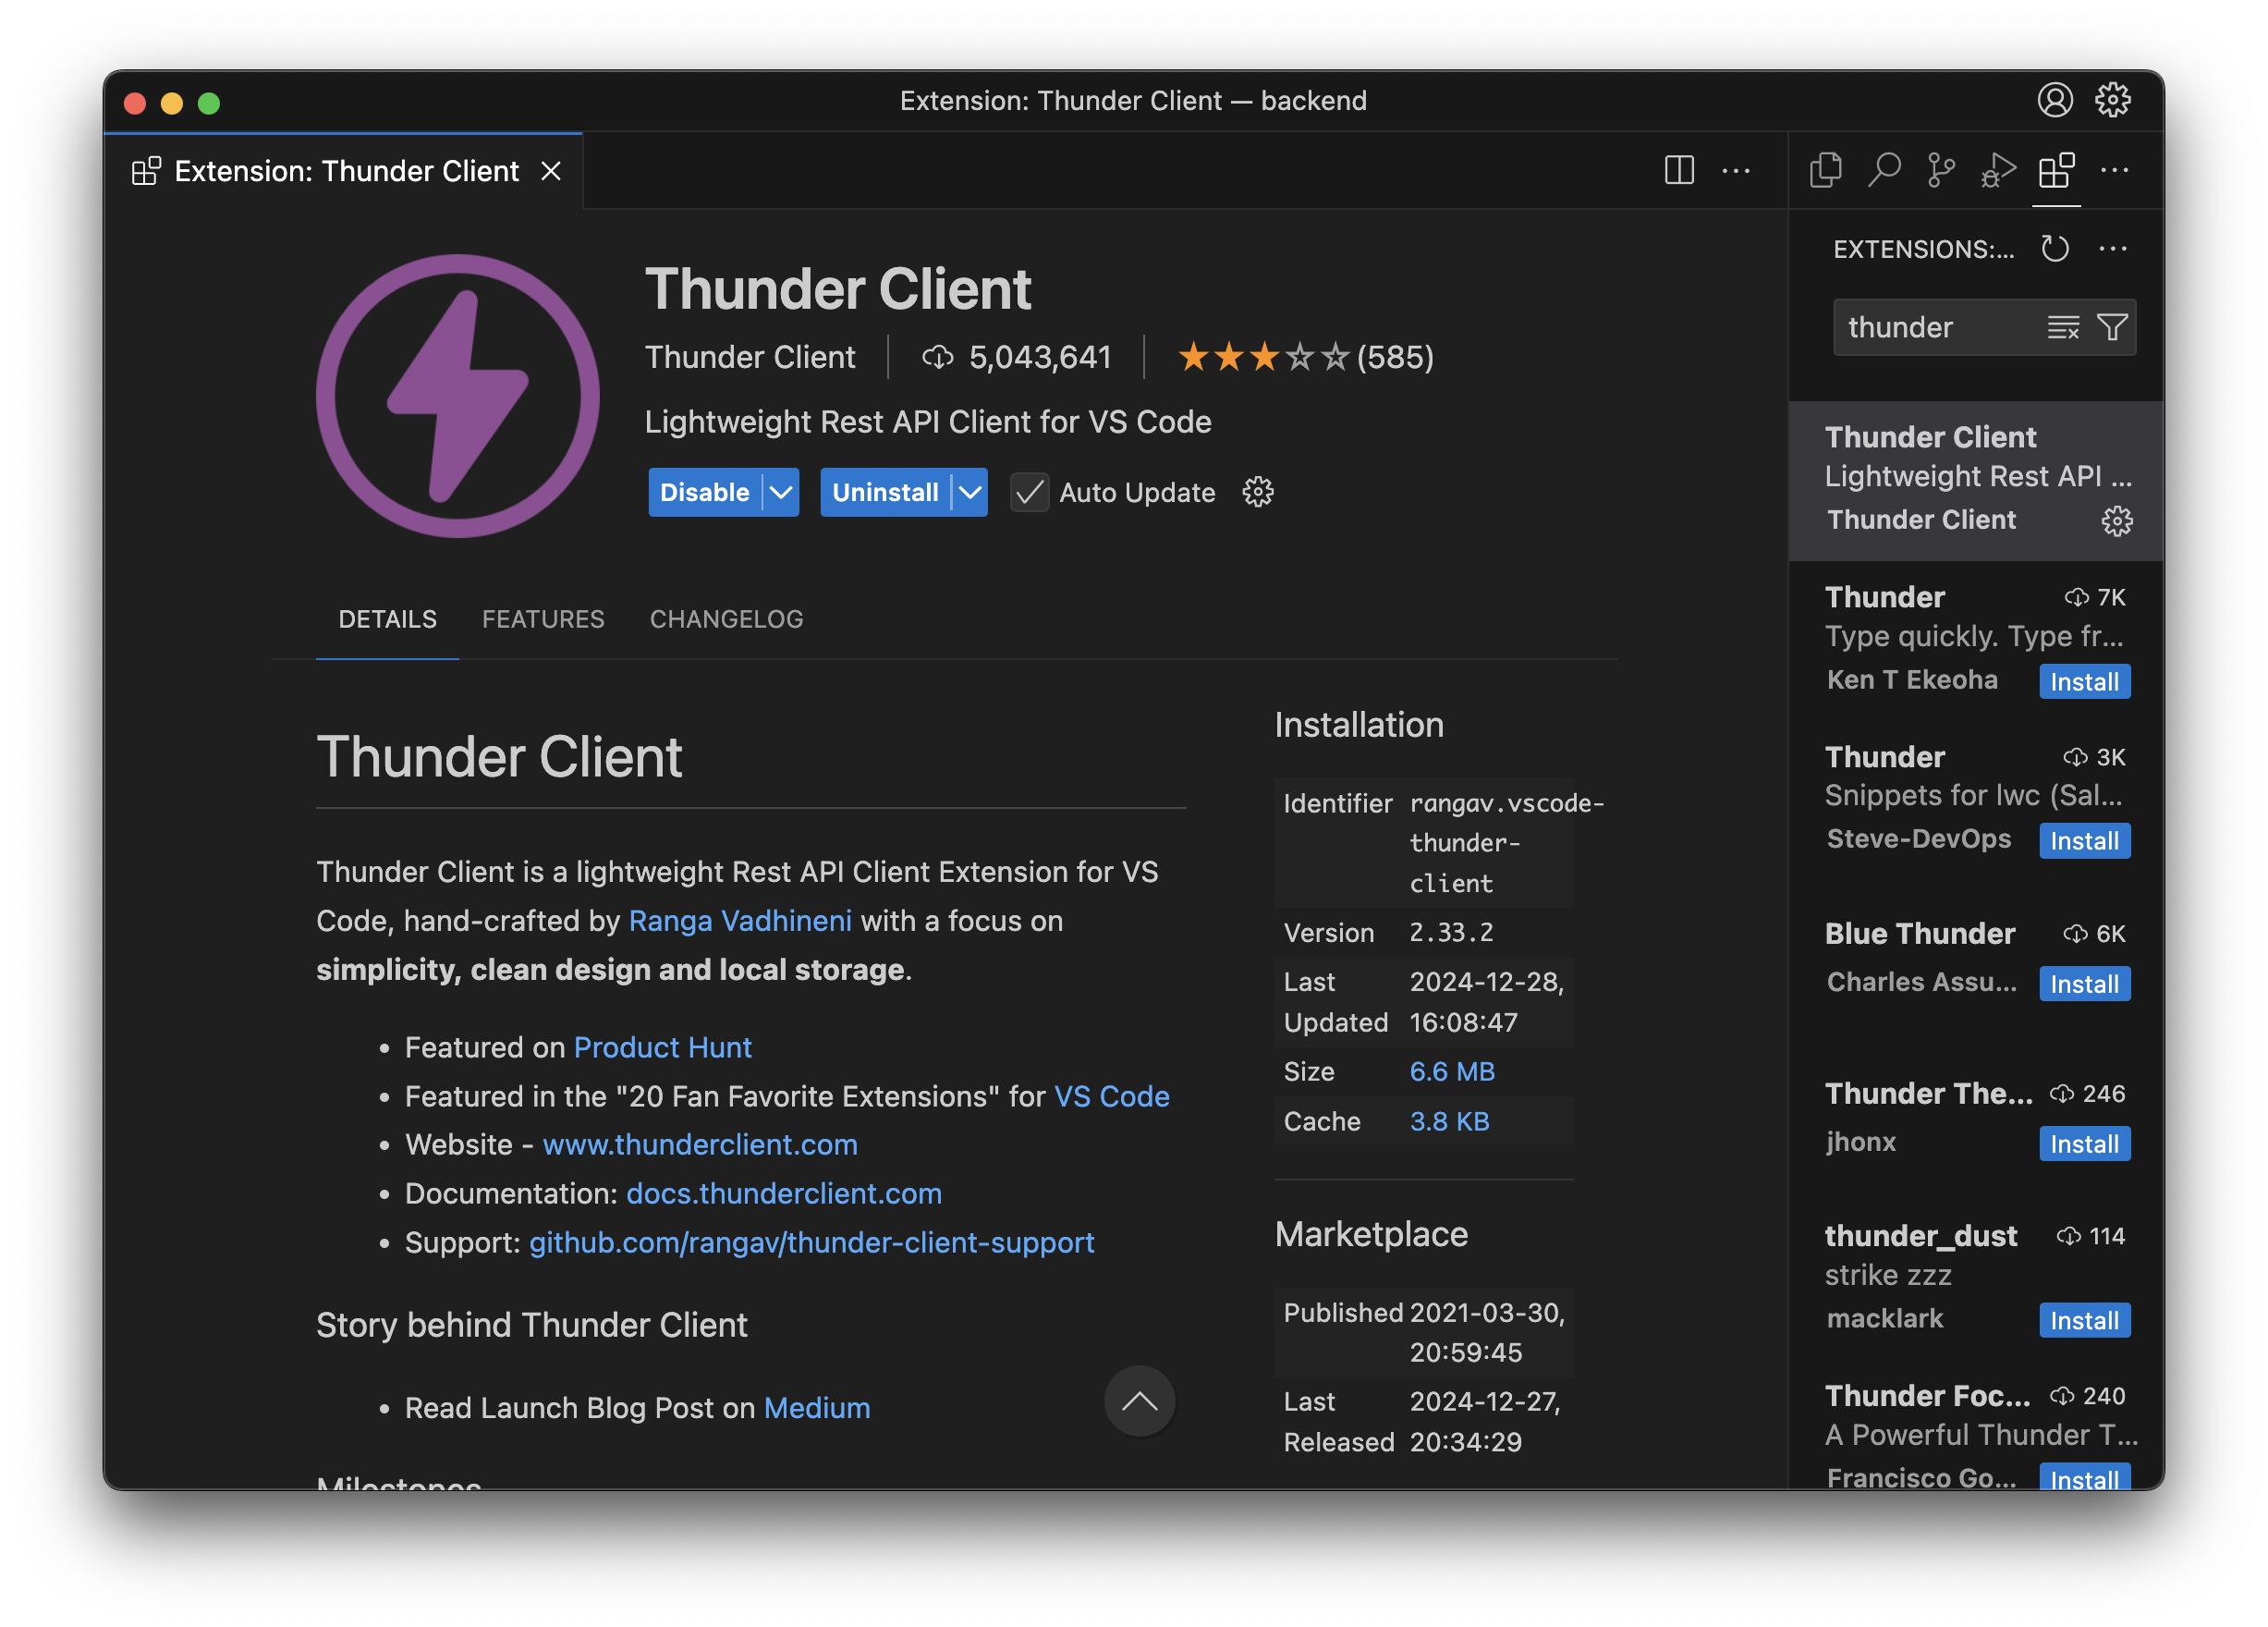
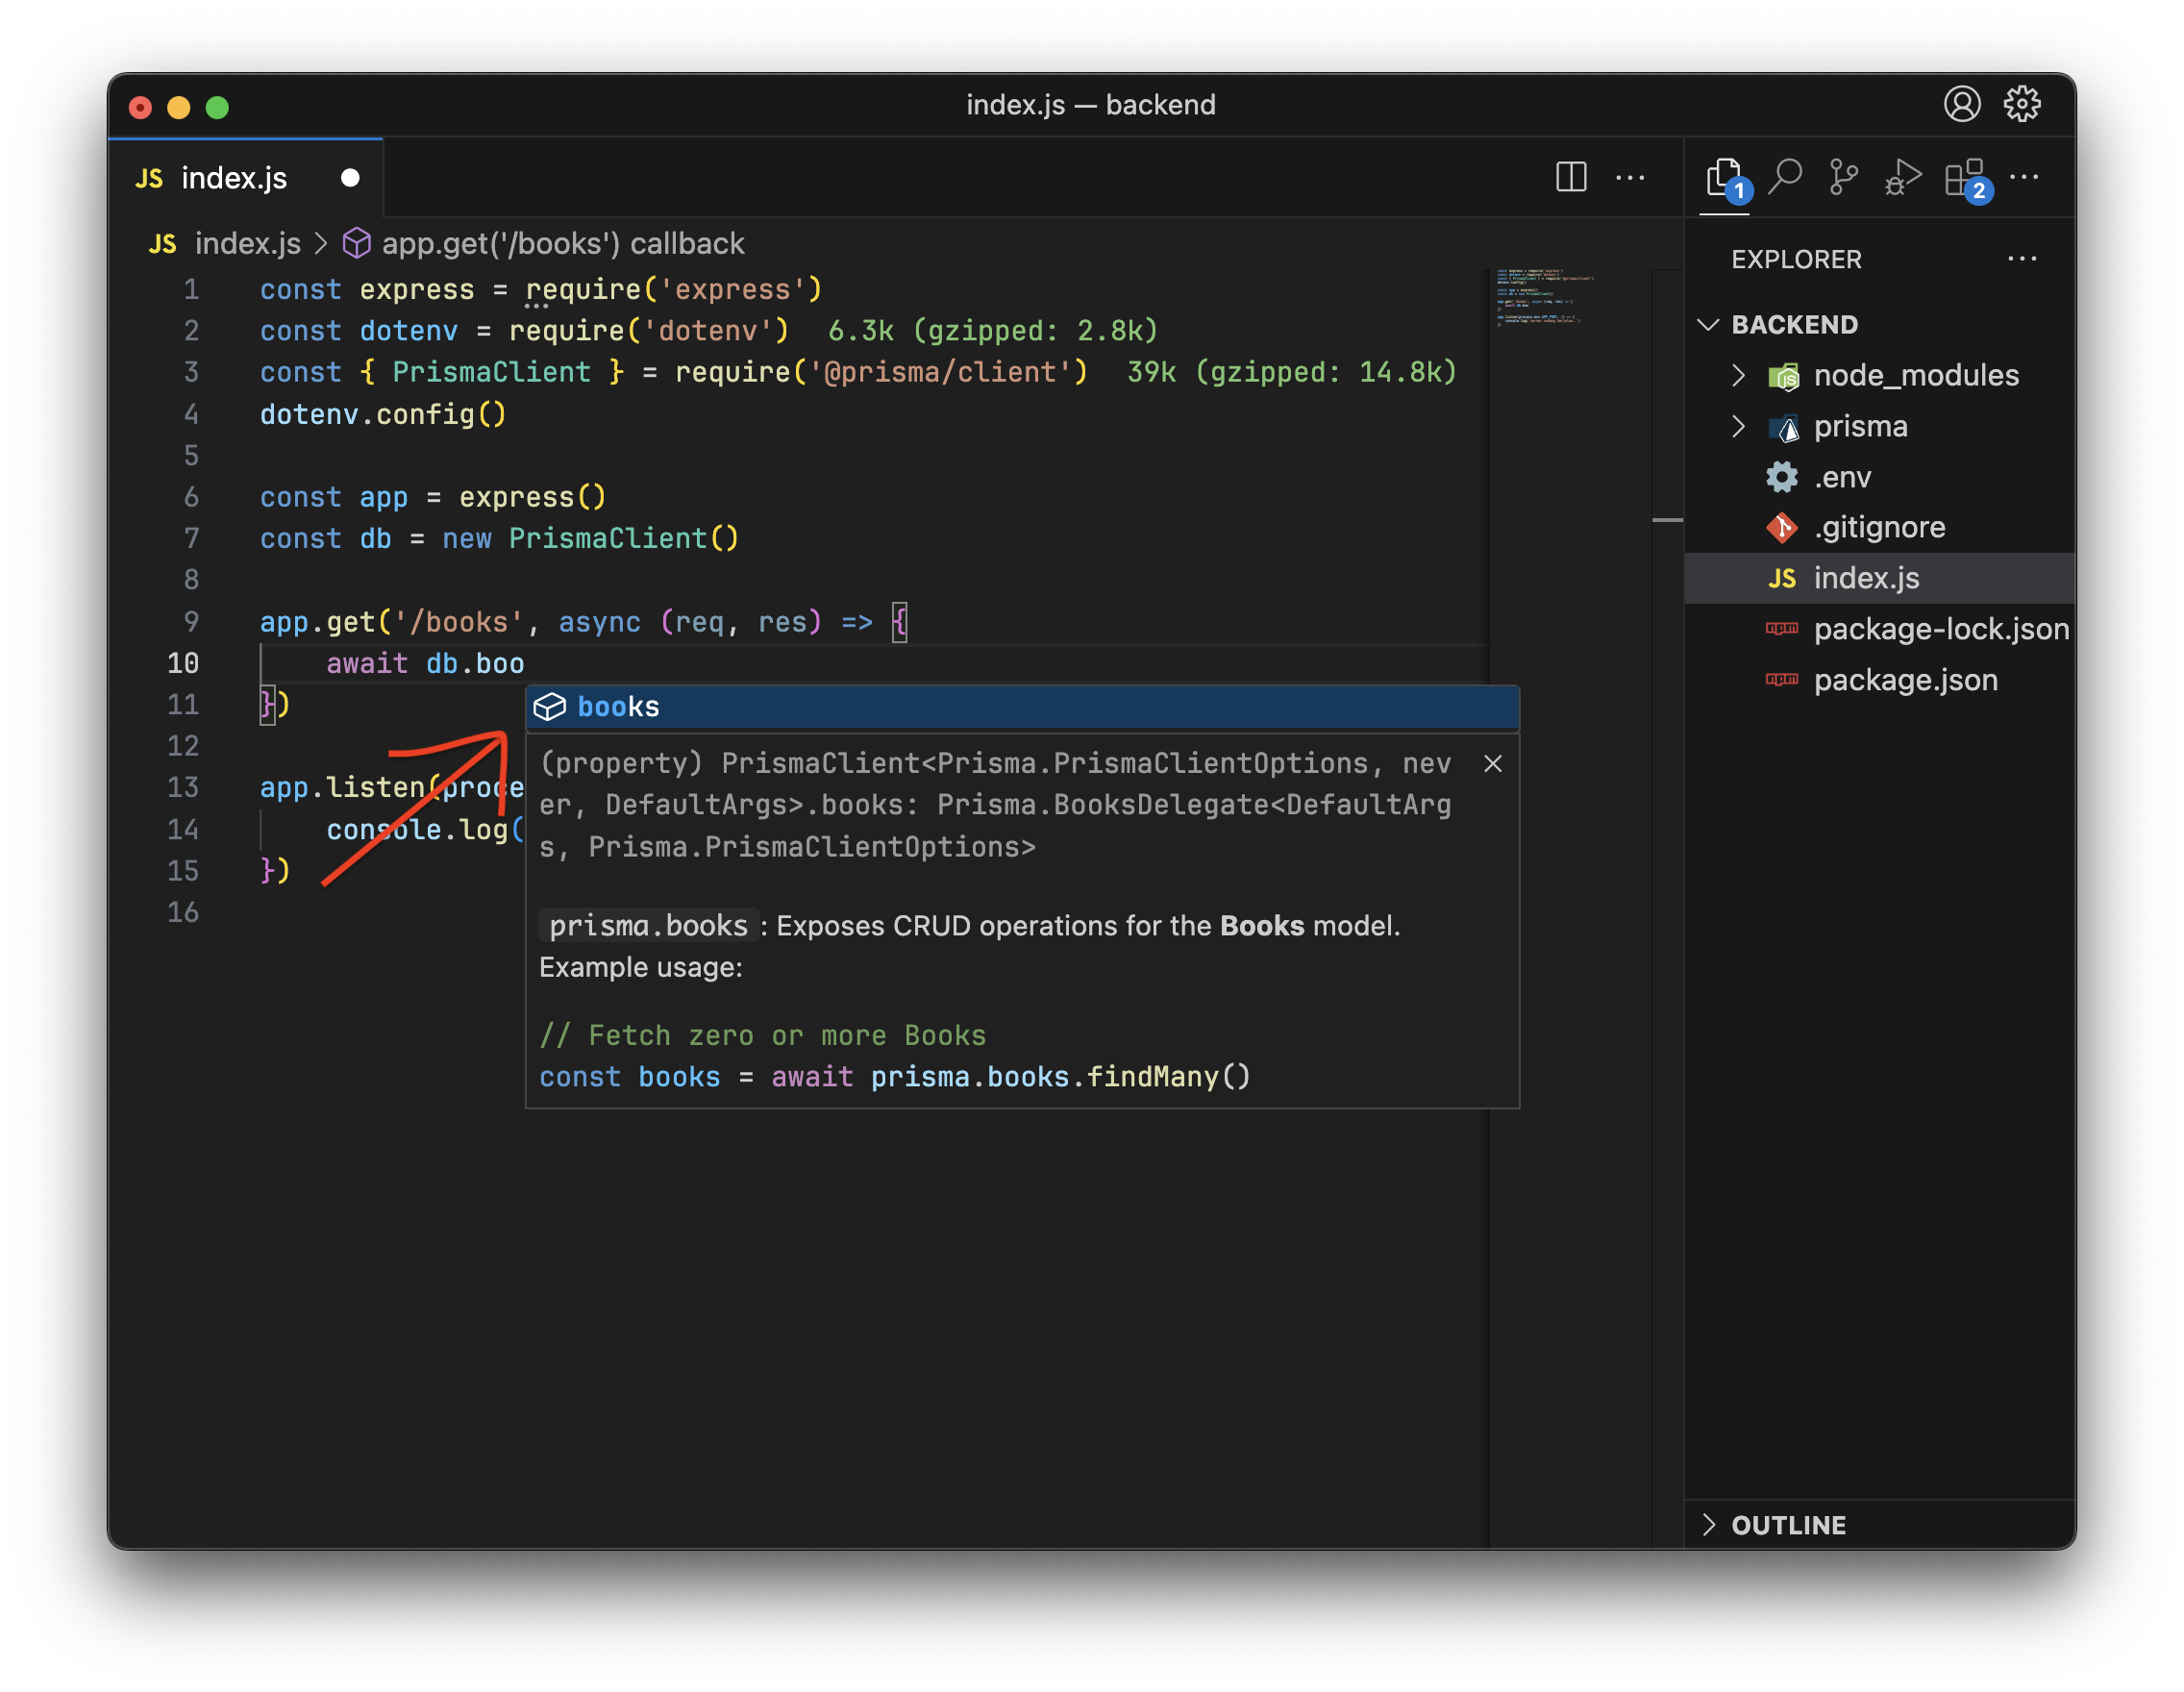
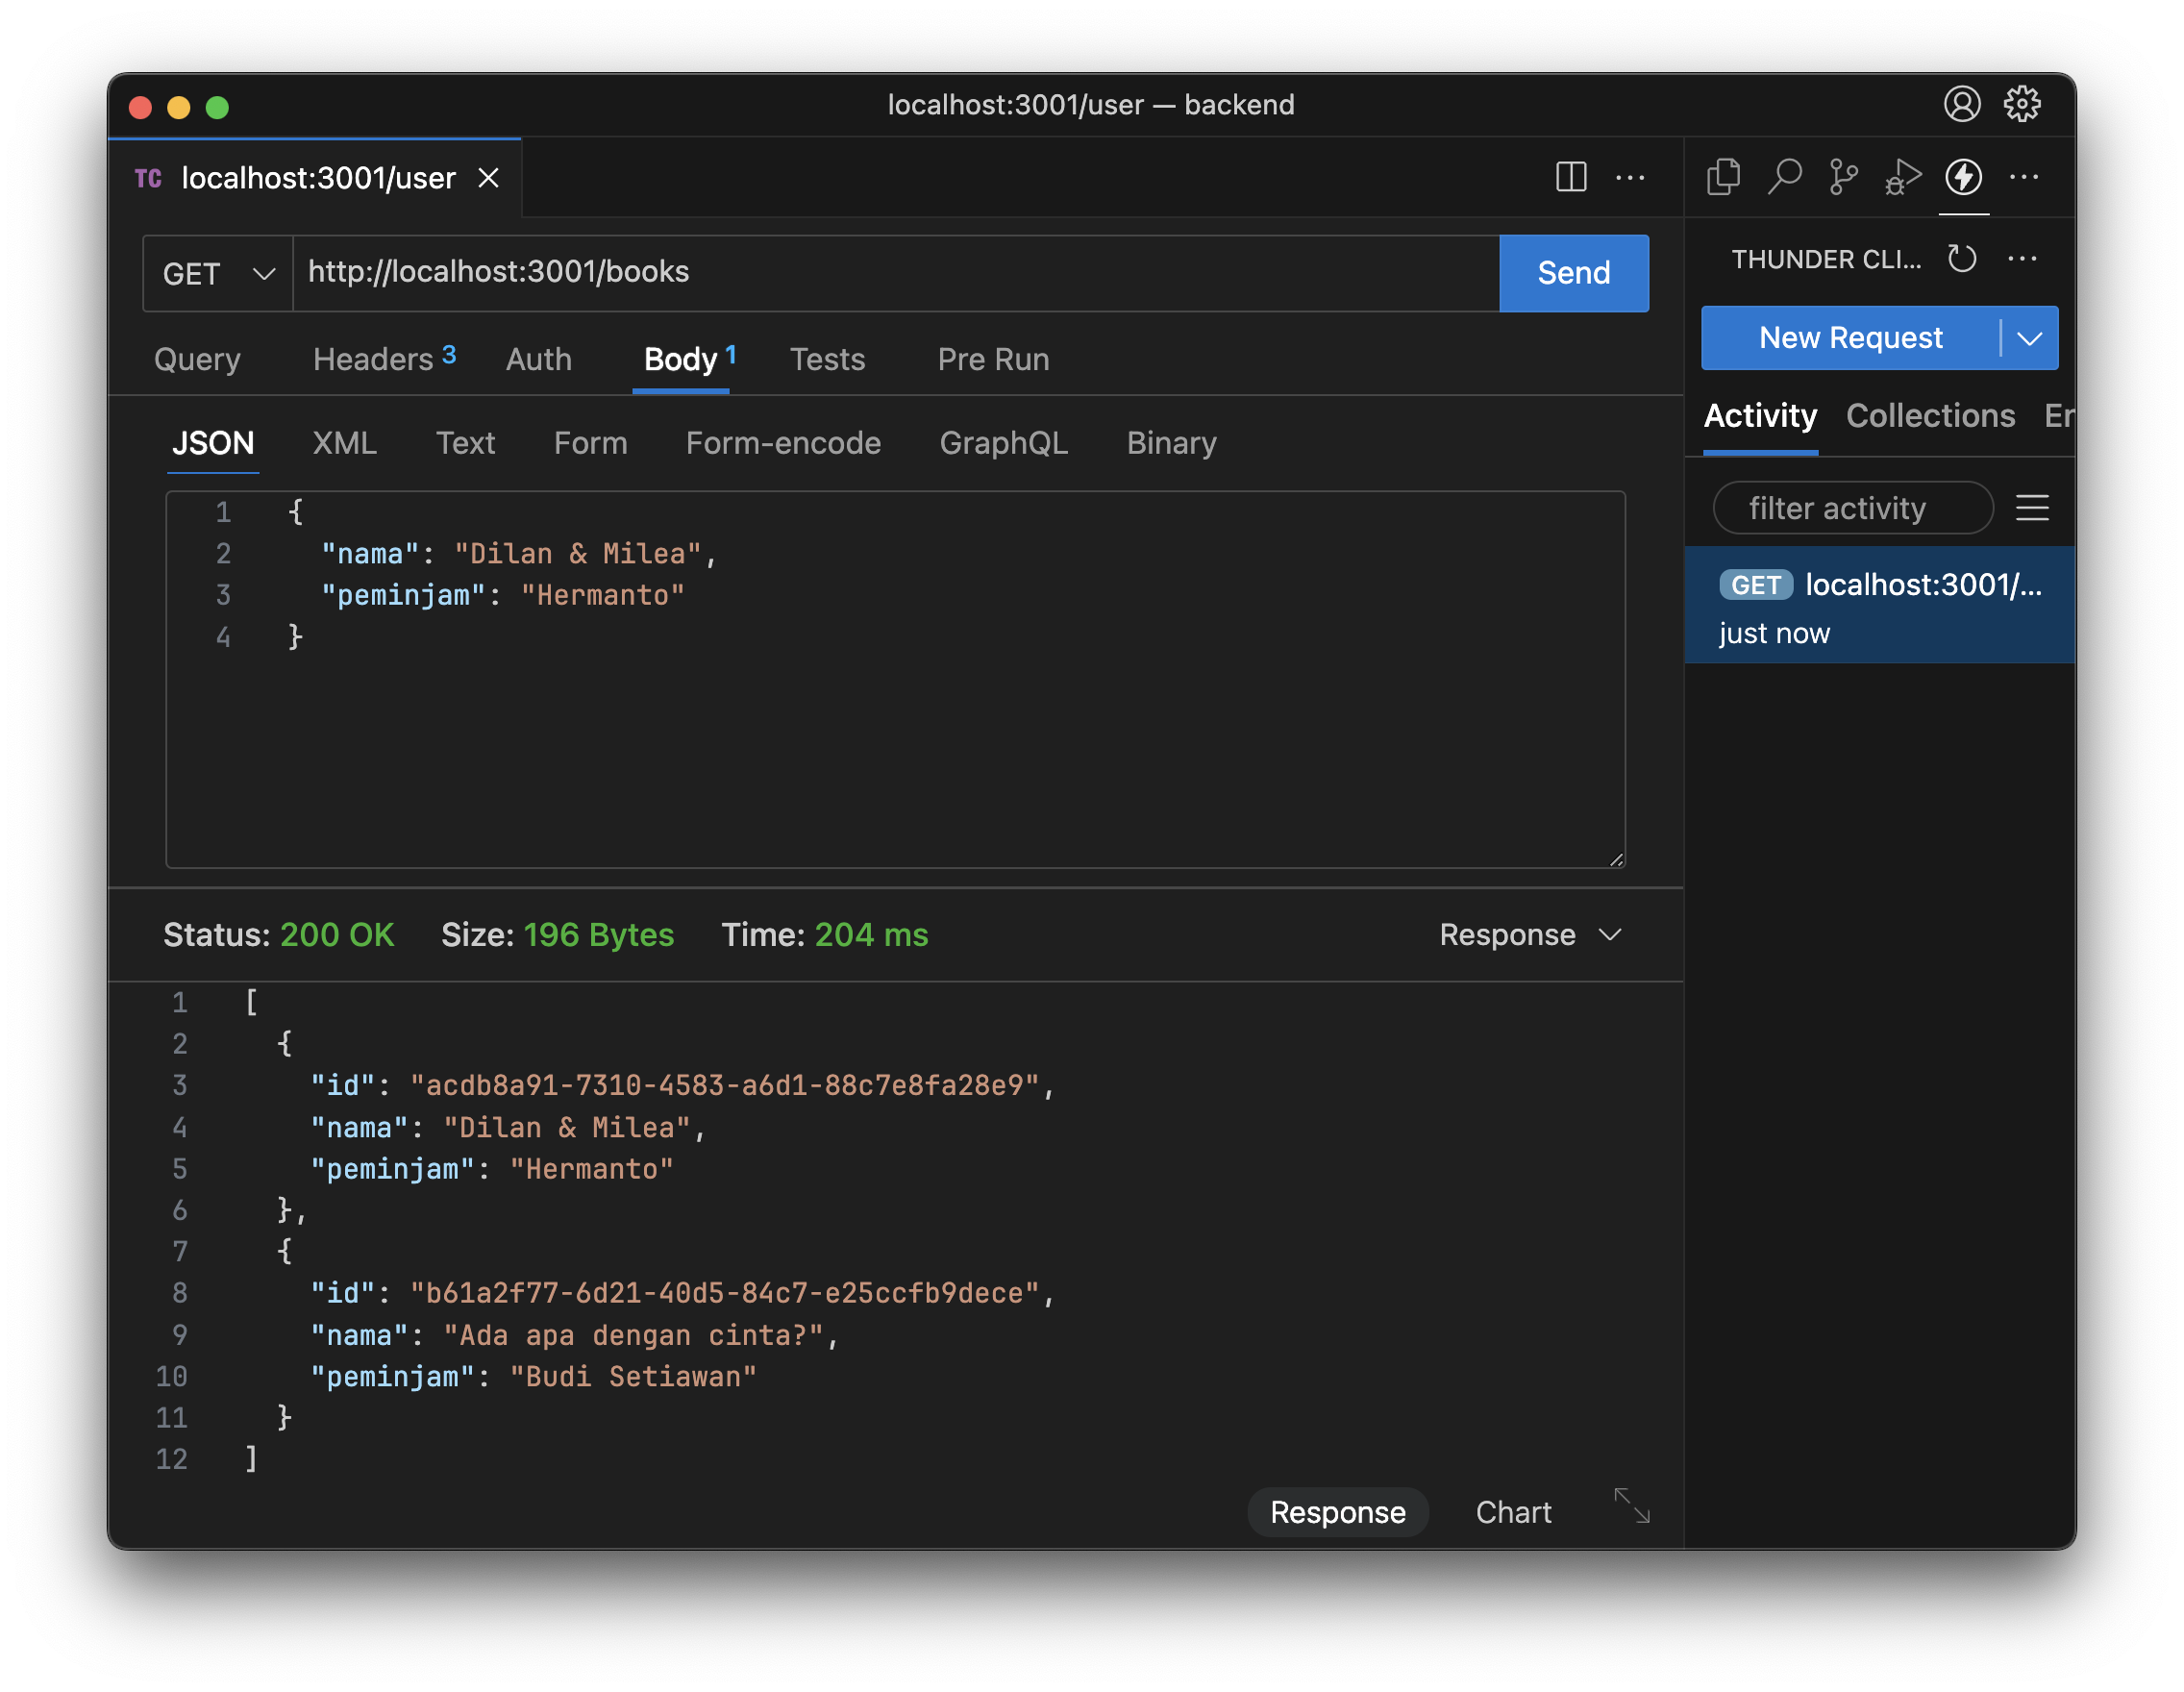
GET /books
We’ll keep everything in index.js.
npx prisma generate, you get autocomplete when using @prisma/client, matching the schema you defined.
http://localhost:3000/books, and click Send. The response is [] because no books have been added yet.
POST /books
Here we use the req (request) object to read JSON from the request body.
Add this so Express can parse JSON:
{"nama": "Book Title", "peminjam": "John"}), and click Send. You should see the success message.
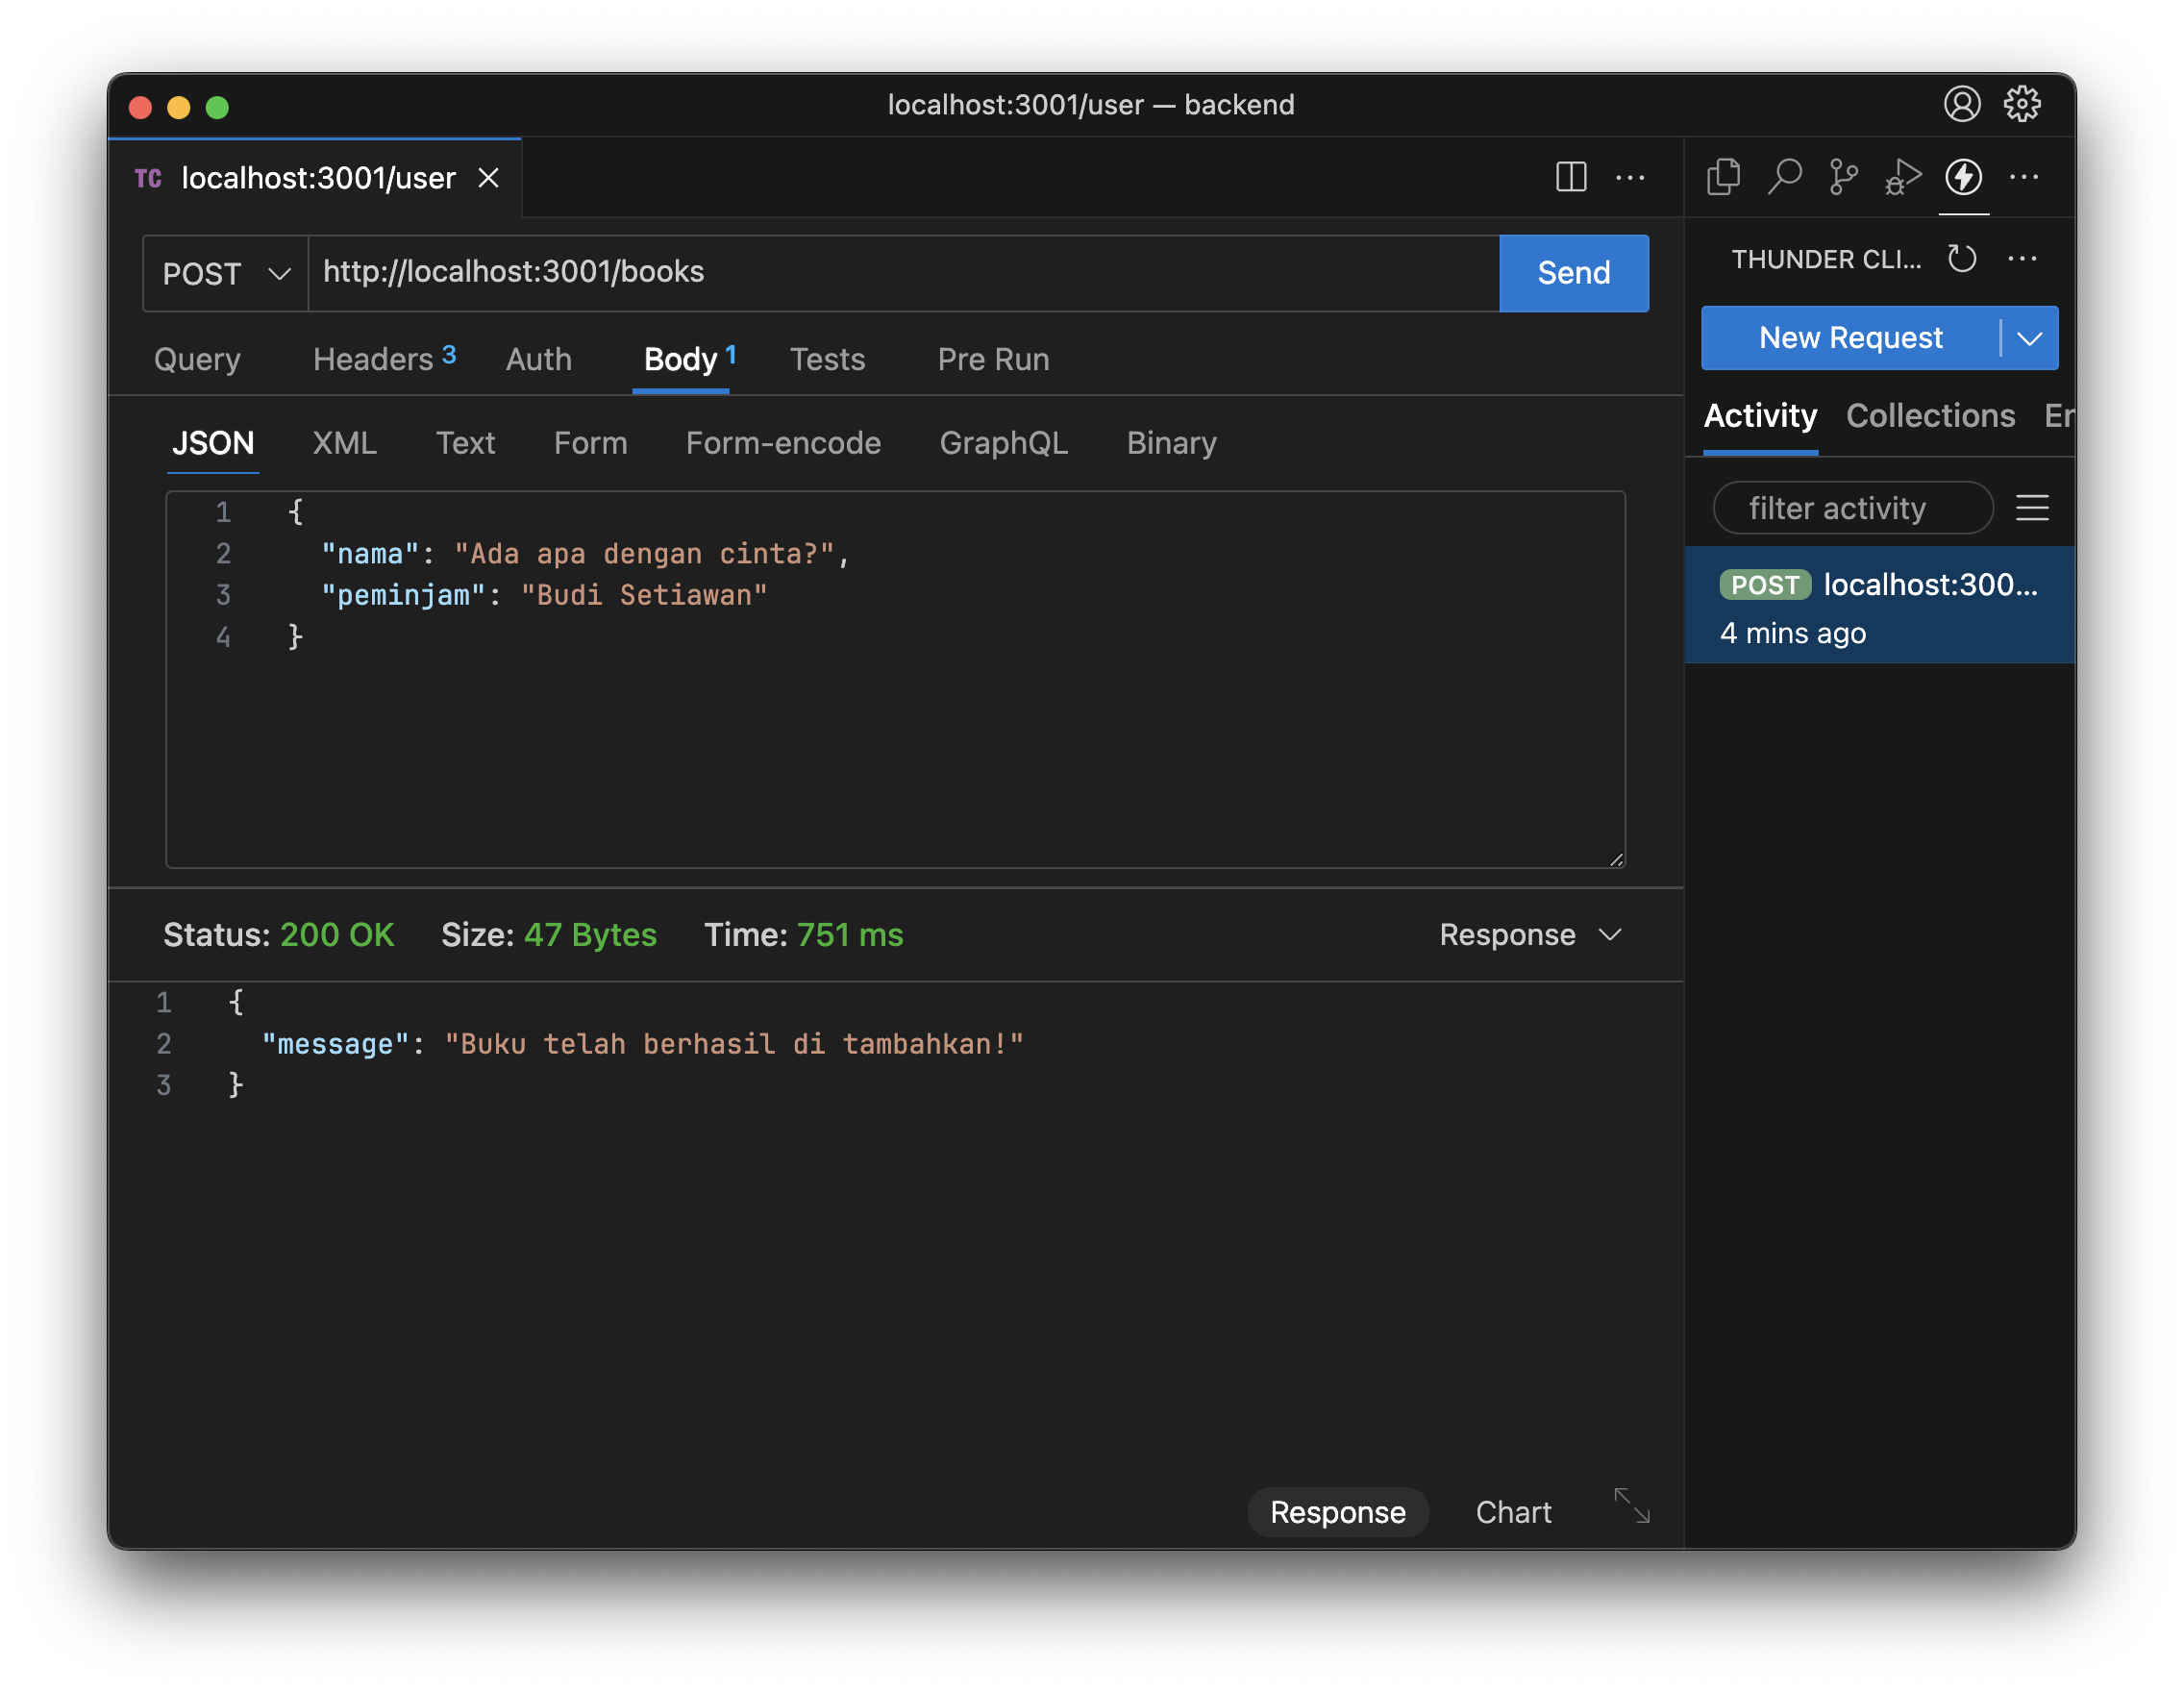
/books again—you’ll see the books you added, with id values generated by uuid() from the schema.
PUT /books/:id
The route uses /books/:id so id is a dynamic segment (it changes per request). Read it with req.params:
id is updated:
DELETE /books/:id
Same idea as PUT: use req.params.id and call db.books.delete() instead of update. Try implementing it yourself.
Cool-down
Does your API fully implement CRUD? Do all book routes work, including Delete? In the next project we’ll add try/catch for error handling and a route to get a single book by id.Refinement
Welcome to the final project! Your task is to refine the library API we built by completing the steps below.Before uploading your project, delete the node_modules folder.
- #1 Add a DELETE route to remove a book by id.
- #2 Add a GET route that returns a single book by id.
-
#3 Add status codes to every response. Use:
res.status([status code]).json({ message: '...' })For a full list, see HTTP status codes.Status code When to use? 200 Success returning data 201 Success creating new data 404 Data not found 500 Server error - #4 Wrap each route in a try/catch block for error handling:
Submit
Add your Github link or project in Google Drive then the community will review
and help you together. Please stay tuned on Discord to see the latest updates!